Pages

Kitchen Parade Extra: Caramel Corn ♥

Who else is itching to get into the kitchen for fruitcake, Christmas cookies, holiday candies, all the wonders of holiday baking? I can hardly wait!
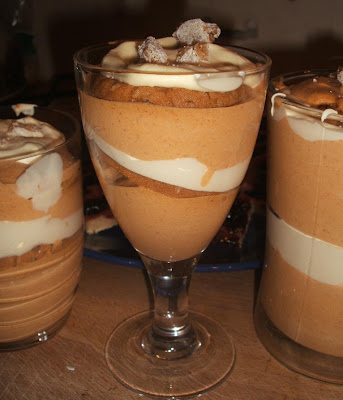
This recipe for caramel corn (and corn is a even vegetable, yes?!) is great in the interim, satisfying both a sweet tooth and a baking binge. The caramel corn is made in the microwave with nothing more than a few ingredients and a paper bag -- and some shake-it-up fun!

It's from a 2002 Kitchen Parade column, published today online for the first time. So here it is, my recipe for homemade caramel corn.

And because I'm expecting a houseful, already I'm planning menus and stocking the freezer, some times testing new recipes, other times turning to long-time family favorite recipes already published at KitchenParade.com, especially all the soup recipes and wintry comfort food recipes.


SO WHAT IS KITCHEN PARADE, EXACTLY? Kitchen Parade is the food column that my Mom started writing for our family newspaper when I was a baby. Today it's published in my hometown newspapers in suburban St. Louis and features 'fresh seasonal recipes for every-day healthful eating and occasional indulgences'. Want to know more? Explore KitchenParade.com, including Kitchen Parade's Recipe Box!

WHY DOESN'T THIS POST ACCEPT COMMENTS? Because I hope that you'll click through to the actual column and comment there!

E-MAIL & RSS SUBSCRIBERS You may subscribe to Kitchen Parade directly, then you'll receive the complete column and recipe directly in your In Box or RSS reader. Just sign up for Kitchen Parade via e-mail or Kitchen Parade via RSS.

A Veggie Venture is home of the Veggie Evangelist Alanna Kellogg and award-winning vegetable inspiration from Asparagus to Zucchini. © Copyright 2007


reade more... Résuméabuiyad

Now, A Reason to Use Up That Sherry....

If you have ever wondered what to do with the bottle of sherry that your friend brought back from Spain, I (or rather Delia Smith) have the perfect recipe.
I am not a big sherry drinker, finding it too heavy and sweet for sipping purposes. However, it is an excellent all-round alcohol for cooking with, whether you want to add a bit of depth to a stir-fry or gravy, bolster a rich, meaty ragu or to bring out the natural sweetness of berries. You might even use it in a trifle.
Sherry, or particularly Marsala, is used to it's greatest success though in that most traditional of all Italian sweets, Zabaglione. A simple mousse-like dessert, comprising of egg yolks, sugar and Marsala (but other sweet wines can be used for different flavour) whisked in a double boiler, until light and fluffy. There is a charming story from 15th Century Italy that describes the initial process of how Zabaglione was discovered. A skillful and fierce Umbrian nobleman called Giovan Baglioni (known locally as Zvan Bajoun) was forced to keep his army of men happy (apparently they would switch sides if they were not given suitable rations – a case of politics being ruled by the stomach) when they were fighting and, discovering that he only had some eggs, honey and sweet wine at his disposal, ordered his cooks to boil everything in a pan and serve up the resulting dish. The solders so enjoyed this sweetened, slightly frothy mixture that they asked for seconds, slept soundly that night and fought with such vigour the next day that the surviving opposition asked them what was their secret. They simply replied Zwanbajoun. Over time, the name has been refined to Zabaglione, the method has been made simpler and the honey replaced with sugar. However, It is still considered as a “pick-me-up”, no doubt due to the high alcohol content, although I am not sure if the Italian army are still served it as part of their daily menu!

Delia Smith, Britain’s first true TV domestic goddess, has generously visited Harry's Bar in Venice on our behalf, sampled the many Venetian treats they have to offer and returned with a truly stunning torte that is both simple and wonderfully delicious, Harry's Bar Torta di Zabaglione.
An all in one, featherlight sponge cake, so light as to be almost of pudding texture, filled generously with a rich, thick Zabaglione-inspired cream.
The cream needs to be chilled for at least two hours, so make this first. The cake can also be made a few hours in advance and wrapped in clingfilm when cooled, ready to cut in half when you are.
It is simple enough to serve for a casual afternoon tea on Sunday but looks glamorously pale enough to be served for a special occasion too. In her book, How to Cook Pt.3, Delia ices the sides but leaves the golden top plain, just dusted with icing sugar. However, you may find, as I did, that this was a little hard to achieve. Despite being chilled, the filling remains just a bit too creamy to give a perfect presentation to the cake. I simply slathered it on all over. And you will have cream left over. Just eat it with a spoon. Cooks treat, of course.

Oh, and it is just as good a couple of days later, providing it has been well fridged. At this point, heavily laden with the boozy cream, it really does become pudding like. And terribly, wonderfully, moreish.
The perfect Pick-Me-Up!

HARRYS BAR TORTA DI ZABAGLIONE from Delia Smiths How to Cook Book 3
Ingredients:
For the Zabaglione filling:
3 large egg yolks
3 oz (75 g) golden caster sugar
1½ oz (40 g) plain flour, sifted
9 fl oz (250 ml) Marsala
12 fl oz (340 ml) double cream
For the cake:
4 oz (110 g) self-raising flour
½ level teaspoon baking powder
2 large eggs, at room temperature
4 oz (110 g) very soft butter
4 oz (110 g) golden caster sugar
¼ teaspoon vanilla extract
a little sifted icing sugar, to dust

You will also need a 1½ in (4 cm) deep sponge tin, 8 in (20 cm) in diameter, lightly greased and the base lined with silicone paper (baking parchment).
First of all make the Zabaglione filling. Using an electric hand whisk, beat the egg yolks for 1 minute in a medium bowl, then add the sugar and beat until the mixture is thick and pale yellow (about 3 minutes). Next, whisk in the flour a tablespoon at a time, mixing in very thoroughly, then gradually whisk in the Marsala.
Now tip the mixture into a medium heavy-based saucepan and place over a medium heat. Then, cook the mixture, stirring constantly, until it has thickened and is just about to boil; this will take about 5 minutes. Don't worry if it looks a bit lumpy, just tip it into a clean bowl, then whisk until smooth again. Let the custard cool, whisking it from time to time to stop a skin forming. When it is cold, cover with clingfilm and pop in the refrigerator for at least 2 hours. Pre-heat the oven to gas mark 3, 325°F (170°C).
Meanwhile, make the cake. To do this, take a large mixing bowl, place the flour and baking powder in a sieve and sift into the bowl, holding the sieve high to give them a good airing as they go down. Now all you do is simply add the other cake ingredients to the bowl and, provided the butter is really soft, just go in with the electric hand whisk and whisk everything together until you have a smooth, well-combined mixture, which will take about 1 minute. What you will now end up with is a mixture that drops off a spoon when you give it a tap on the side of the bowl. If it seems a bit stiff, add a little water and mix again.
Now spoon the mixture into the tin, level it out with the back of a spoon and place the tin on the centre shelf of the oven. The cake will take 30-35 minutes to cook, but don't open the oven door until 30 minutes have elapsed. To test whether it is cooked or not, touch the centre lightly with a finger: if it leaves no impression and the sponge springs back, it is ready. Remove it from the oven, then wait about 5 minutes before turning it out on to a wire cooling rack. Carefully peel off the base paper, which is easier if you make a fold in the paper first, then pull it gently away without trying to lift it off. Now leave the sponge to cool completely.
To assemble the torta, whip the double cream in a large bowl until stiff, then add the Zabaglione custard to the bowl and whisk again until thoroughly mixed. Place the cake flat on a board, then, holding a serrated palette knife horizontally, carefully slice it into 2 thin halves. Next, reserve 2-3 heaped tablespoons of the Zabaglione filling to decorate the sides of the cake and spread the rest of the filling over the bottom half, easing it gently to the edges. Place the other cake half on top and press down very gently. Before you spread the mixture on the sides of the cake, it's a good idea to brush away any loose crumbs, so they don't get mixed up in it. Now, using a small palette knife, spread the reserved filling evenly all around the sides of the cake. Finally, dust the top with the icing sugar before serving. If the cake is made and decorated ahead of time, store it, covered, in the fridge (to keep it firm), but remove it half an hour before serving
(recipe taken from directly from Delia's website, as I cannot possibly improve on it!)
reade more... Résuméabuiyad

Spaghetti Squash Cooked Whole ♥

Cooked whole, then used like noodlesOkay, I finally get it.

Each time I cook spaghetti squash, no matter how, I'm unimpressed by the taste. Sure, it is easy to cook. Sure, it has virtually no calories. But why waste one's energy on food with no taste?

My sister likes spaghetti squash, however, so she's always puzzled by my reaction. Three times now, she's repeated, "I just cook it for the noodles."

Oh, right! Here's the deal: cook spaghetti squash and then put it under something, just like we would noodles or rice or potatoes. That makes it a virtually calorie-free, carb-free starch. Get flavor from what's on top, not the spaghetti squash itself.

Sisters are smart!

When Adanna mentioned she'd cooked a whole spaghetti squash with great success, this I heard her the first time! I cooked one whole today for lunch, leaving the washed unpricked spaghetti squash in the oven at 350F for an hour. And then I put some peppery-hot lentil soup over top. Perfect.

NEXT TIME How long to cook spaghetti squash? The strands were cooked after an hour but next time I'll leave the squash in longer, say 90 minutes, to see if the strands become more noodle-y with more time in the oven.

MAKE IT A MEAL That's Oven-Cooked Lentil Soup there on top. Yum!


VEGETABLE RECIPES from the ARCHIVES

~ how to roast a whole butternut squash ~
~ how to roast a whole pumpkin ~

~ more winter squash recipes ~
~ more quick vegetable recipes ~

~ Zucchini Ribbons, another 'vegetable noodle' ~

~ one year ago this week Harvard Beets ~
~ two years ago today Pumpkin Corn Bread ~


SPAGHETTI SQUASH COOKED WHOLE

Hands-on time: 1 minute to start, 5 minutes to finish
Time to table: 70 - 90 minutes
About 3 cups of 'noodles' from a 2 3/4 pound spaghetti squash

1 spaghetti squash

Set oven to 350F. Wash the squash, especially around the stem and blossom ends where bacteria can collect. Place directly on a rack in the center of the oven, setting the timer for 60 or 90 minutes plus whatever time is left to preheat.

When the squash is done, remove from the oven. Holding the squash with potholders, slice it pole to pole. Scoop out the seeds and discard. With the tines of a fork, scrape the flesh to separate the strands into noodles.

Top with something delicious!


PRINT JUST A RECIPE! Now you can print a recipe without wasting ink and paper on the header and sidebar. Here's how.

NEVER MISS A RECIPE! For 'home delivery' of new recipes from A Veggie Venture, sign up here. Once you do, new recipes will be delivered, automatically, straight to your e-mail In Box.


Eat more vegetables! A Veggie Venture is the home of Veggie Evangelist Alanna Kellogg and is the award-winning source of free vegetable recipes, quick, easy, and yes, delicious. Start with the Alphabet of Vegetables or dive into all the Weight Watchers vegetable recipes or all the low carb vegetable recipes. © Copyright 2007


reade more... Résuméabuiyad

A Sweet Thanksgiving Pt.3

The third and final sweet treat of Thanksgiving was a spin on the classic Pumpkin Pie.
I find Pumpkin Pie to be a little anti-climatic, possibly because it is not part of my foodie heritage and to that end, Paul is not a big fan of our Christmas Pudding.
It is an interesting nuance of our foodie cultures that we expect certain foods at specific times of the year, otherwise it would seem as though something were missing. For example, I loath Christmas Cake, can't stand it, but I love the stiring and baking ritual of it, the smell of spices filling the kitchen as it cooks.
Likewise, I find the pumpkin/eggy mixture to be a little cloying. One slice is always more than enough. Curiously, I adore Egg Custard Tarts, with their speckly Nutmeg tops, and Pumpkin Pie is merely an orange extension of that ancient tart.
The Pumpkin Pie is steeped in history, just as our Christmas Pud is: the first European settlers (eventually deciding to live on the Plimoth Plantation in New England in 1621) discovering how the American Indians made great use of this fantastically shaped gourd, the Pumpkin, found it incredibly versatile, and used it in both sweet and savoury dishes.
The American love of pies goes back many hundreds of years so it comes as little surprise then that the settlers used simmered pumpkin flesh in a pie of sorts. In those formative days, they would not have had ovens, so they may have filled the hollowed out shells with the flesh simmered with milk, honey and spices. This would have then been baked in hot ashes and produced the earliest variations of Pumpkin Pie, albeit a pie without a crust.
The first mention of a pie crust (or paste) being filled with pumpkin, was in 1651 and not by a Settlement wife, but by French chef, Francois Pierre la Varenne:

"Tourte of pumpkin - Boile it with good milk, pass it through a straining pan very thick, and mix it with sugar, butter, a little salt and if you will, a few stamped almonds; let all be very thin. Put it in your sheet of paste; bake it. After it is baked, besprinkle it with sugar and serve."

In 1796, some 140 years later or thereabouts, the first American Cookbook was published, American Cooking by an American Orphan (actually Amelia Simmons) and she notes, not one, but two recipes for Pompkin Pudding (sic):

Pompkin Pudding No. 1. One quart stewed and strained, 3 pints cream, 9 beaten eggs, sugar, mace, nutmeg and ginger, laid into paste No. 7 or 3, and with a dough spur, cross and chequer it, and baked in dishes three quarters of an hour.
Pompkin Pudding No. 2. One quart of milk, 1 pint pompkin, 4 eggs, molasses, allspice and ginger in a crust, bake 1 hour.

Her charming recipes are very similar to those we utilise today, securing the Pumpkin Pie’s place in culinary history as a true American Classic. However, being a classic simply isn’t enough for some of us and this age-old recipe has to be tweaked, primped and altered beyond all recognition. Enter Ina Garten.
I love Ina Garten and her carefree style of cooking. Her portion diagnostics occasionally leave a little to be desired for those cooking only for 2 or 4, but a little modifications usually reigns them back in.
In her latest book, Barefoot Contessa at Home, she gives us a winning alternative to Pumpkin Pie in the form of Pumpkin Parfait. Whilst she doesn't exactly sell it to me by referring to it as "...certainly not the worst dessert I'd invented," it is in fact much better than you might imagine.
A whippy, light concoction of tinned pumpkin spiced up with nutmeg and cinnamon of course, a whole cup of two different types of sugar (brown and white), whipped, sweetened cream, a good slug of rum, and for gelatin virgins, a gentle primer in the form of a sachet of, well, gelatin.
This is layered up with more whipped cream and ginger biscuits, to form a deliciously creamy dessert that deserves more than one outing a year.
Ina suggests making the Ginger Cookies (recipe in aforementioned book), but being short on time, I bought some Stem Ginger Cookies which worked really well. At a push, Ginger Nuts (Ginger Snaps) would be great too. The dessert is incredibly rich and certainly needs the bite of something crunchy so don’t be afraid to stack up the ginger biscuits.
One last proviso – if you are serving this dessert for ‘special’ guests, don’t do what I did and forget that you don’t actually have any sundae glasses. As you can see, we had to make do with a beer tankard (yes, of course we have those!), a wine glass and a plastic tumbler. We call it ‘homestyle’.
Here’s the recipe, post-Thanksgiving or not, it’s a great way to use up any old cans of pumpkin you might have lying around, or to utilise them big ol’ gourds that you wondered if you could actually manage to grow this year…

PUMPKIN PARFAIT from Ina Gartens’ Barefoot Contessa at Home
Ingredients:
¼ Cup Rum (I used Brandy, which was just as good)
1 Sachet Gelatin
1 x 15oz Can of pure Pumpkin (not pie filling)
½ Cup Granulated Sugar
½ Cup Light Brown Sugar
2 Large Egg Yolks
½ Tsp Cinnamon
¼ Tsp Ground Nutmeg
Zest of One Orange (I omitted this due to lack of oranges)
½ Tsp Salt
1 ½ Cups Double (Heavy) Cream
1 ½ Tsp Vanilla Extract
2 Cups Whipped Cream plus more for topping
Box Ginger Cookies (or use your own recipe)
Crystallised Ginger for Decoration (optional)
METHOD:
Place the rum/brandy in the top half of a double boiler. Sprinkle with the gelatin and leave to one side for 5-10 minutes. Meanwhile, half fill the bottom half with water and bring to a lively simmer.
In a large bowl, whisk the pumpkin, sugars, egg yolks, orange zest, spices and salt. Set to one side.
Place the pan with the rum/brandy and gelatin over the simmering water and cook until the gelatin has completely dissolved.
Whisk immediately into the pumpkin mixture.
In another bowl, whisk up the double cream with a little icing sugar and the vanilla until it peaks softly. Fold into the ochre pumpkin mix.
To assemble, put a thick layer of the pumpkin mousse into the bottom of your sundae glasses (or beer tankards), then a good gloop of whipped cream, then a couple of ginger biscuits. Continue until all of your mixtures are used up. The parfaits will look gorgeously swirled and peachy.
Cover with cling film and chill for at least four hours, preferably overnight.
To serve, top with more fresh whipped cream and crystallised ginger crumbled.
ENJOY!
reade more... Résuméabuiyad

Oven-Cooked Lentil Soup Recipe ♥

Chop-chop, then just leave it in the oven for five hours
Today's soup recipe: Hearty lentil soup, slow cooked right in the oven at a low heat. A great option for anyone who doesn't have a slow cooker.

Does this soup look worth trading, say, for apple pie?

That was the deal, a piece of American Apple Pie for the recipe for this oven-cooked lentil soup, all in fun, of course, since the recipe holder (hi, Rass!) was getting pie anyway and the pie-maker (me) often swaps recipes with Rass and his wife, dear family friends for more than 50 years.

And Rass' lentil soup is a good one! It takes some knife work to get started, then is left in the oven for a perfect five hours. What comes out is perfectly cooked, hot and hearty, steamy and spicy, utterly delicious. It's perfect for cold winter days.

MAKE IT A MEAL Soup and hot bread, yes? Think about pairing the lentil soup with Weeknight-Easy Rolls.

OVEN-COOKED LENTIL SOUP

Hands-on time: 30 minutes
Time to table: 5 1/2 hours
Makes 10 cups

1/2 pound smoked ham, cubed
1/2 pound thick-cut bacon, cut in small cubes (the bacon in my fridge was iffy so I skipped it, but know from tasting Rass' own soup that bacon contributes to the soup's heartiness)

2 tablespoons olive oil (I'd recommend skipping this if using the bacon but Rass cooks the bacon in the oil)
1 large onion, diced
2 ribs celery, diced
1 green pepper, diced
4 cloves garlic, chopped
2 carrots, sliced thin in 'coins'
14 ounces canned diced tomato
14 ounces canned tomato sauce
1 cup red wine (Rass fills one of the cans halfway, then sploshes it around to rinse)

1 cup lentils (Rass uses brown lentils which are softer and a little bit creamier, I used what was on hand, black lentils from Trader Joe's which are 'meatier' and hold their shape better but are less creamy)

2 bay leaves
1 teaspoon dried thyme
1 teaspoon marjoram
1 teaspoon rosemary
1 teaspoon cumin
1 tablespoon dried parsley (I skipped this)
Salt & pepper to taste

4 cups beef bouillon (I had some beef broth on hand, mixed it with chicken)

Turn oven to 250F.

In a large oven-safe pot such as a Dutch oven, start cooking the bacon, add the onion, celery, green pepper and garlic as they're prepped, stirring often to distribute the fat. Then, as Rass says, "Chuck everything into the kettle, stir it up and put into the oven (covered) for five hours."

Hmmm. As I read his instructions carefully now, I realize that Rass doesn't cook the onion-celery-etc with the bacon but instead cooks the bacon on its own, then "chucks the rest in". Rass makes a mean lentil soup, you won't go wrong with his method!


A Veggie Venture - Printer Friendly Recipe Graphic


MORE LENTIL RECIPES
~ Lentil Salad with Tomatoes, Dill & Basil ~
from A Veggie Venture

~ Two-Way Lentil Skillet ~
~ Lentil Soup Vincent ~
from Kitchen Parade


Eat more vegetables! A Veggie Venture is the home of Veggie Evangelist Alanna Kellogg and is the award-winning source of free vegetable recipes, quick, easy, and yes, delicious. Start with the Alphabet of Vegetables or dive into all the Weight Watchers vegetable recipes or all the low carb vegetable recipes. © Copyright 2007


reade more... Résuméabuiyad

A Sweet Thanksgiving Pt.2

The second of our Sweet Thanksgiving desserts, Banana Cream Pudding, holds a very special place in my heart for two reasons. Going way back to my childhood, a stripped down version of Banana Cream Pudding, sliced banana smothered in packet custard. A virtually instant and gratifying finish to a homely meal. I feel particularly fond of Banana Custard because it is my grandfather’s favourite pudding; in fact anything with bananas is his favourite. My grandad was the one who first showed me how to slice a banana before peeling it, and afterwards he would have to feign mock surprise as I demonstrated my new trick to him.
The second reason I am so fond of Banana Cream Pudding is that the true ingredients of the dish, Vanilla Pudding and Nila Wafers remind me of my first road trip to the US with my then-to-be husband, Paul. We put on pounds travelling around US, eating Nilla Wafers from the box and scooping out various flavours of Pudding with our our already Cheetoe-orange strained fingers. I later returned to the UK with boxes of powdered pudding in all sorts of lurid flavours and broken Nilla Wafers that hadn’t entirely survived the manhandling of the luggage handlers.
I hadn’t eaten banana custard OR Nilla wafers OR pudding for some time and Paul had requested that his Mom send us a box of the wafers over in a large care box containing several now-well thumbed issues of Gourmet Magazine. Suffice to say, the request for Banana Cream Pudding was soon demanded but I was given one proviso: I cannot use custard, I have to find a recipe for Vanilla Pudding. Just between me and the UK readers, custard is a fairly good representation of Pudding, particularly if you make it really quite thick, or use a cartoned brand (they keep forever – literally – in the pantry).
However, in this instance, I conceded and found a recipe on the Nabisco (home of the Nilla Wafer) website. Pudding is easy to make, flour, sugar, milk, egg yolks whisked up in a double boiler until the lumpy gloop turns smooth and thickens. It is then liberally, generously blanketed over sliced bananas and Nilla Wafers (there is no UK substitute for these – and, even though I am a biscuit connoisseur, I cannot think of a similar alternative. Some of those fancy Breton-style Butter rich shortcake biscuits would be just as yummy though), covered with Meringue and flashed briefly in a hot oven to brown. I thought that a sweet meringue topping would be too much sugar so replaced this with another childhood favourite, Dream Topping.
Dream Topping is our nearest equivalent to America’s Cool Whip, an amazing demonstration of what a evil genius with a craving for whipped cream but no refrigerator and open access to a cupboard full of chemicals, can produce. Both Dream Topping (a powder that you whisk up with milk) and Cool Whip are airy creams, with no hint of dairy flavour and a slightly sweet demeanour. I find both of them completely alluring and perfect for this already calorie laden pudding.
You can, of course, use regular whipped cream or go for the meringue option.
For a real retro treat, here’s how to whip up Banana Cream Pudding:
BANANA CREAM PUDDING
serves at least 6-8
Ingredients:
5 Bananas, peeled and sliced, sprinkled with a little 7-up or lemon juice to stop them browning
1/2 Cup Sugar
1/3 Cup Plain Flour
Pinch Salt
3 Egg Yolks (reserve the whites for meringue topping, if making)
2 Cups Milk
½ Teaspoon Vanilla Extract
Box Nilla Wafers (or similar buttery-style biscuit)
Whipped Cream or a Sachet of Dream Topping or Cool Whip (if not making the meringue)
METHOD:
In the top half of a double boiler, whisk together the flour, sugar and pinch of salt. Then whisk in the milk and egg yolks. Place over the bottom half of the double boiler (which will need to be quarter filled with water and brought to a brisk simmer).
Whisk mixture for 10-12 minutes, or until thickens.
Pour a little of the mixture into a heatproof serving dish, layer with the Nilla Wafers or biscuits, then a layer of sliced bananas.
Repeat this layering twice more, ending with the Pudding.
If you are going for the cream topping, slather all over the top and decorate with some more Nilla Wafers and slices of banana.
If you want to make the meringue topping, whisk the egg whites until stiff, pour in a quarter of a cup of sugar and whisk until stiff and glossy. Spoon over the pudding, taking care to cover over all the edges and bake in a pre-heated oven (175c) until browned, about 15-20 minutes.
Spoon into large bowls and straight into mouth.
Enjoy!
reade more... Résuméabuiyad

A Sweet Thanksgiving Pt.1

Just because Paul and I ‘eat sensibly’ during the week doesn’t mean that we don’t treat ourselves at the weekends. And this weekend was no exception. In fact, I probably went a little OTT with the sweet treat, making not one, not two but three puds!
OK, so one of them had to be made for Paul’s pumpkin Thanksgiving treat. The other two, well, I just felt like making them.
Here then, is the part one of our Sweet Thanksgiving Weekend one off series: Cafe Sperl's Plum Squares.
The recipe, taken from Diana Henry’s wonderful Roast Figs, Sugar Snow, has been tempting me for some time. I haven’t done a lot of baking for a while and this recipe seemed like a gently re-introduction into the fine world of blending cream, sugar and flour to produce something sublime.
This recipe involves a vanilla scented shortcrust base that is easily whipped up in the food processor (although could be mixed up by hand), chilled for half an hour and then pressed into a baking sheet. It is then topped with stoned and halved plums or damsons, sprinkled with a generous amount of sugar and baked until fruit is verging on sweet, sticky collapse. The fruity shortbread is then glazed with hot apricot jam, left to set and cut into squares.
Aside from the dazzling, gem-like finish, this is otherwise a fairly unassuming looking cake/biscuit(?), with a flat base. Once you bite through the sticky tart and sweet fruit into the fragrant crumbly pastry, you are transported (with a bit of imagination) to a baroque-style café in Vienna, sipping hot chocolate and watching children sweep by in velvet coats on ice skates.
There is something timeless about these simple sweetmeats, so easy to make and yet incredibly complex on the taste buds.

I used some frozen plums left over from late Summer, but you could also use slices of pear or apple, fresh blackberries, greengages or gooseberries. The fruit doesn’t need to emit too much liquid as it cooks, lest you should suffer a soggy bottom, although a light dusting of fine cornmeal (polenta) on the base before you layer up the fruit should soak up too much ooze if you really fancy trying it with strawberries or raspberries.
A simple, sweet treat that can be made the day before you want to serve it, looks just as charming served casually with a cup of tea or coffee as with a generous slug single cream for a decadent pudding.

CAFE SPERL'S PLUM SQUARES (from Diana Henry's Roasted Figs, Sugar Snow)
Ingredients:
200g Plain Flour
100g Butter, not fridged
175g Caster Sugar
Salt
1 Egg Yolk
1 Tsp. Vanilla Extract
675g Plums or other soft fruit, de-stoned if necessary
2 tbsp Sugar
200g Redcurrant or Apricot Jam
METHOD:
To make the base, place the flour and butter in a food processor fitted with the plastic blade and process until the mixture resembles breadcrumbs. Add the sugar and salt, mix again.
Add the egg yolk and vanilla and process until it forms a rough ball.
Scoop out of the processor bowl, form into a ball, wrap in clingfilm and chill for half an hour.
Preheat oven 180c.
Halve the plums and de-stone.
Into a lined baking sheet 8 x 12" square, press the dough out.
Press the plums into the dough rectangle in rows, making just one layer.
Sprinkle with the 2 tablespoons of sugar and bake for 35-45 minutes until the fruit is soft, sticky and caramelised. The pastry, where exposed, should be a golden brown colour.
Leave to cool.
Melt the jam with a little water and brush generously over the fruit. It should be gleaming and glossy.
Leave to set, then cut into 3" squares, larger or smaller if you'd prefer.
Enjoy!
reade more... Résuméabuiyad

Kitchen Parade Extra: Cranberry Apple Crisp ♥

A wintry take on a fall favoriteHello from cold and snowy (and glorious) northern Minnesota where on Thanksgiving Day, the dawn temperature was about zero (yes, Fahrenheit) and ice diamonds fell from clearwater blue skies much of the day. Today, soft snow began to fall about noon, especially magical as people gathered to sing carols and light the town Christmas tree. It's no wonder I've got winter on the mind, you'll see the evidence in this week's recipe in Kitchen Parade for Cranberry Apple Crisp which also makes up in 'diet', 'topping' and 'crumb pie' versions. It's a lovely combination of sweet and tart, a wintry take on fall's favorite.


SO WHAT IS KITCHEN PARADE, EXACTLY? Kitchen Parade is the food column that my Mom started writing for our family newspaper when I was a baby. Today it's published in my hometown newspapers in suburban St. Louis and features 'fresh seasonal recipes for every-day healthful eating and occasional indulgences'. Want to know more? Explore KitchenParade.com, including Kitchen Parade's Recipe Box!

WHY DOESN'T THIS POST ACCEPT COMMENTS? Because I hope that you'll click through to the actual column and comment there!

E-MAIL & RSS SUBSCRIBERS You may subscribe to Kitchen Parade directly, then you'll receive the complete column and recipe directly in your In Box or RSS reader. Just sign up for Kitchen Parade via e-mail or Kitchen Parade via RSS.

A Veggie Venture is home of the Veggie Evangelist Alanna Kellogg and award-winning vegetable inspiration from Asparagus to Zucchini. © Copyright 2007


reade more... Résuméabuiyad

The Puddings Start Tomorrow!

The joy of soup is in its relative simplicity, quickness and the instant gratification you get from the very first spoonful.
But, when I tell my Mother that I’m cooking soup for tea, she’s quick to point out: “how on earth will Paul be full on that?”
I have noticed that certain people from a certain generation feel that meat and two veg is the only meal you can serve your hardworking husband when he gets home from work.. After all, a strapping young man like that needs his nourishment.
What most people don’t know about Paul though, is that he was a vegetarian in his youth and in college survived on a diet of boiled rice and soy sauce. For which I thank him profusely.
Our conjoined lives are made that much easier by our non-committal to a raging, carnivorous desire to eat red meat garnished with the odd overcooked sprout or soggy carrot. We don’t spend our evenings gnawing on ribs and tossing the bones to our drooling, anticipatory hounds, or nibbling chicken wings clean, cartilage, tendons and all.
That’s not to say that we don’t have our moments. On next weeks menu is Oxtail Soup, made with one of the most gelatinous, meaty and flavoursome parts of the bovine beastie. And any leftover meat I plan to throw into a hearty Mulligatawny Soup.
But for last nights meal we tucked into steaming bowls of Green Thai Curry Soup, bolstered generously with Mange Tout, shredded chicken breast, French Beans and Beansprouts.
And that’s the thing about soup. You think it’s never going to be enough, but as you reach the bottom of the bowl, scooping out all the best bits that have sunk to the bottom, concealed like buried treasure beneath the pale green broth, you start thinking: “I couldn’t manage another bite. Well, maybe a couple of peanut M&Ms.”
For those of you who are Thai Green Curry virgins or have only used the stuff in jars, I would suggest that you try to make your own paste. Most ingredients are readily available from your local supermarket now and it keeps for a couple of weeks in the fridge in a seal tight container (I keep mine in the little coffee/spice grinder I make it in), and in fact, improves over time, becoming more mellow and flavourful. At a push, the jarred pastes are generally quite good.
One final note: the vegetables and meat recommended are just that: a recommendation. We use what we have lying around. You could use prawns instead of chicken, or one of those mixed seafood selections (just remember to put them in at the very last moment lest the squid turn into rubber). Thinly sliced beef or pork would also add a good flavour to the soup. And just for the record: the meat is entirely optional. Vegetables could include fresh thinly sliced Shiitake Mushrooms, baby corn, Bok Choi, Aubergine, Courgette or perhaps even some diced squash. I also place some Straight to Wok noodles in the bottom of the bowls and pour the soup over the top. You could boil up some regular dried noodles if you’re not a fan of the Straight to Wok ones.
TIP! A way to make the soup even more nutritious and savoury is to add half a block of creamed coconut to a pint of boiling chicken/fish/vegetable stock and then stir in a tablespoon of crunchy peanut butter. Whisk together well then add to the paste where you would normally add the coconut milk.
THAI GREEN CURRY SOUP
serves 4-6
Ingredients:
Paste (from Nigel Slater's Appetite)
4 lemongrass stalks, tougher outer leaves discarded

2-6 green chillies (the 3” long ones), deseeded or not depending on your heat tolerance
3 cloves garlic, chopped
2" galangal or ginger, peeled
2 shallots or half a small white onion, peeled, cut in half
4 tbsp chopped coriander
1 tsp ground cumin
1 tsp chopped lime zest
1 tbsp nam pla (Thai fish sauce)
½ tsp ground black peppercorns
Curry:
1 Tin Coconut Milk
400ml Chicken/Fish/Vegetable Fish Stock
500g Vegetables: baby corn, mange tout or sugar snap peas, halved Green Beans, Beansprouts, Diced Aubergine (nb: If you are using Aubergine, I would recommend frying it off with the meat before you add the paste, otherwise it just doesn’t taste that great), sliced Shiitake Mushrooms etc.
500g sliced Chicken (I used breast but thighs have a better flavour)/raw Prawns/thinly sliced Beef or Pork
3 Tablespoons Groundnut Oil
1 Tablespoon Nam Pla
Juice and Zest from 1 Lime
Half a Bunch of Chopped Coriander
Seasoning to Taste
METHOD:
To make the paste, throw all the ingredients into a spice grinder and whizz until fragrant and smooth. You may need to add a little more lime juice to get everything to cohere. Alternatively, you could probably do this in a blender or, the worst possible scenario, in a pestle and mortar.
To make the curry, heat the oil in a wok or shallow frying pan. Fry off the meat (i.e. chicken, beef, pork or aubergine if going for the vegetarian option) until browned on all sides. Remove to a plate.
Turn the heat down to medium and add a little more oil if the pan seems dry. Stir in a couple of tablespoons of your freshly made (or jarred) Thai Green Curry sauce. It will sizzle but then start to simmer. After a couple of minutes it will smell deliciously fresh and fragrant.
Pour over the coconut milk and stock or coconut/peanut butter mixture and bring to a brisk simmer. Leave to mingle for 5-10 minutes then add the Nam Pla, Lime Juice and Zest, browned Meat, Vegetables and half the chopped Coriander. Leave to simmer for another 5 minutes.
Taste for seasoning. I always need to add a little salt and pepper but you may not need to.
If you are using prawns or seafood add them now and simmer for a couple minutes more.
To serve, ladle into deep bowls and sprinkle with the remaining chopped Coriander.
You can also make this into a more substantial meal by adding a little cornflour dissolved in cold water to thicken it and serving with Jasmine Rice.
Enjoy!
reade more... Résuméabuiyad

Pot Stickers

Dim Sum are not particularly popular over here in the UK yet. I mean, it took us more than 40 years to catch onto sushi and I still can’t imagine anyone over the age of 70 relishing a delicious Salmon Skin Roll. My own grandfathers’ face, contorted into a mask of disgust at the thought of cold rice AND raw fish, will be forever etched into my mind when I first introduced him to the joys of supermarket sushi (and, as our dear old Coney would say, leave ‘em be).
Dim Sum is another matter altogether though. There is no searingly hot chilli to contend with, no raw fish to dice with and the chopsticks are entirely optional. Add all these winning factors to the irrefutable fact that they taste mighty fine and you’re onto a winner.
Or so you would think.
A local Dim Sum restaurant has opened up near us. Keen to visit, we checked out their website, only to be greeted with incredibly expensive delicacies that will surely mean that the death knell of this local restaurant is looming with great rapidity.
Why so expensive though? Sure, Dim Sum are fiddly, they are delicate and dainty. But the ingredients are dirt cheap. Pork Mince? Prawns, and seasonings. We are not talking about lobster and caviar folks, just honest, decent ingredients served in whimsical (to a Brit) steamers. Alas, in this instance, the name Dim Sum (roughly translated: Order to your Hearts’ Content) is – as usual - betrayed by British commercialism and greed.
But, there is hope for those of us who are not fortunate to live near a Dim Sum restaurant that offers great value as well as great food: make your own!
Don’t be shocked, it’s easy to wrap things in, er, wrappers. You’ve made egg rolls, right? Used Filo pastry? Wrapped a Band-Aid around your bleeding finger, using your non-dominant hand? Dim Sum are, therefore, a piece of metaphorical cake.
And, if you’re scared of wrappers, then take heart. Not all Dim Sum is fiddly. Chicken Feet, Spare Ribs, Congee Rice all take the form of Dim Sum. And for the sweet-toothed among you, there are the delicious dumplings, tarts and puddings, made with Red Bean Paste, Mango, Tapioca and, curiously, very little chocolate at all.
If you’re feeling particularly adventurous, you can organise a Dim Sum feast for friends and get most of the prep work completed the day before.
As for us, sitting here all smug proselytising about the joys of Dim Sum, we can confirm that yes, we have made some and yes, they were entirely successful, if not aesthetically pleasing (although for a first attempt, still quite cute really): Savoury Dumplins’, known in China as Jiaozi and in Japan as Gyoza.
The dumplings, little savoury morsels of ground pork, prawn, water chestnuts, cabbage, ginger etc, encased in Wonton Wrappers can be poached, steamed or shallow fried (Pot Stickers), served with a dipping sauce or dropped into broth. I favour the Pot Sticker method. It gives a delicious triple texture: the tender upper half of the dumpling which is steamed, the bronzed derriere and the innards, both soft and crisp, depending on the filling. Pot Stickers are traditionally served at special occasions and when turned out, they certainly look stunning when turned out onto a serving platter.
And, despite them looking complex, they are simple to prepare (Paul even made his own Wonton Wrapper dough, which was incredibly quick, simple and easy to work with) and it would be fun to get your guests in the kitchen, forming the little dumplings and arranging them in the frying pan, then digging in with chopsticks around the cooker.
We served our Pot Stickers with some takeaway noodles and rice, but they make a filling treat by themselves.
To make your own Dim Sum Delight, here's how:
SHRIMP AND PORK POT STICKERS (from Gourmet Magazine Feb 2006)
Ingredients:
Dough:
(or you can use ready made Wonton Wrappers which are available on your local Asian supermarket or deli in the chiller)
1.5 Cups Plain Flour
1/2 Cup Lukewarm Water
Filling:
3 or 4 Water Chestnuts (I used canned), chopped into small dice
1/2Lb Prawns, chopped
1/4Lb Ground Pork
3/4 Cup Chopped Spring Onion (about 4-5)
1.5 Tablespoons Soy Sauce
2 Teaspoons Minced Ginger
1 Teaspoon Sesame Oil
METHOD:
To make the dough, stir together the flour and water in a bowl until roughly combined. Turn out onto a lightly floured board and kneed until a smooth dough is formed. Add a little more flour if the dough is too sticky.
Wrap in clingfilm and refrigerate for at least 10 minutes to an hour.
Whilst waiting for the dough to chill, you can mix the filling together by throwing all the ingredients into a large bowl and mixing well. The filling will be sticky. Refrigerate until ready to use.
To make the wrappers, roll out the dough until very thin, the thickness of a sheet of kitchen roll, cut into 3.5" rounds using a smooth biscuit cutter, lightly dusting them to avoid them sticking together. You should get 24 rounds out, reusing scraps.
To form the dumplings, hold a round wrapper in the palm of your slightly cupped hand and, using a measuring tablespoon (rather than a serving tablespoon), scoop some mixture onto the middle of the wrapper. Wet one half of the edge with some water and bring the edges up to the middle and crimp with your finger tips until completely sealed. We did this part wrong and folded them in half, like little Empanadas. If you find this easier, you will still get an impressive looking turnout in the end.
Once you have made the 24 dumplings, heat 1 tablespoon of peanut oil in a 10" frying pan over medium high heat.
To arrange the dumplings, place 7 in the middle of the pan in a simple Chrysanthemum shape, then arrange the remaining dumplings around the outside. You may have to jiggle them around a little to fit, but they will go.
Cook over relatively high heat for 3-5 minutes (depending on how hot your hotplate gets) until the bottoms are browned. We actually needed longer than this because our oven is very temperamental.
Once evenly and deliciously browned, pour over 1/2 cup warm water. It will sizzle a little. Tilt the pan to ensure that the water is evenly distributed, cover and steam for about 10 minutes.
To turn out, carefully get a large plate with no tilting edges, hold over the frying pan and flip over quickly but carefully.
Serve with some dipping sauce, Sweet Chilli is always popular but I mix up my own with a little Soy, a little Nam Pla (Fish Sauce), some Lime Juice, a sliced red chilli, minced garlic and ginger and some sugar to taste. Leave for at least an hour for the flavours to mingle. This sauce keeps really well in the fridge too.
Enjoy!
reade more... Résuméabuiyad

A Life-Altering Soup

I know, I’m already talking about soup again. I have written more posts extolling the joys of soup than any other dish. I never tire of them: delicate Miso-style broths, bolshy spicy meals-in-a-bowl, more stew than soup, or for ladies who lunch – purees of vegetables, extracting the sheer essence of asparagus, Jerusalem artichokes, or broccoli, to be sipped daintily.
Because Paul and I are on a strict (read: no chocolate, biscuits, cake, crisps or butter) but sensible diet, soups often appear on our evening dinner table (or rather, tray on lap, in front of telly): we have ‘cleansed’ our bodies with Miso Soups, made more substantial with sprinklings of spring onion, glass noodles, little prawn dumplings, beansprouts, tofu and Wakami (dried seaweed, packed with nutrients). I have also added highly nontraditional green beans, chopped in bite size pieces, frozen broad beans and shredded greens and red chillis. Herbs always make an aromatic brew, and coriander and mint are particularly alluring. Miso Soup can be surprisingly filling and feels incredibly nourishing. For flavour, I recommend the Miso Paste which comes in a jar in your local Health Store, but the instant sachets are OK if you’re pressed for time. Hidden at the bottom of your mug, within the murky depths, are tiny shavings of Bonito (dried tuna) and vivid green flecks of Wakami. I am constantly amazed at how the minuscule pieces of shrivelled seaweed swell and flourish when you pour hot water on them.
For a slightly more substantial but no less nourishing soup, I made my own variation of a Green Chilli recipe, taken from Gourmet Magazine (February 2007).
I am thrilled to discover that there are now several online suppliers of Mexican food in the UK. One company, Lupe Pintos, sell a vast array of the La Preferida range (which I often bring back with me in my suitcase after a trip to see the in-laws). Unfortunately this stuff doesn’t come cheap, but it’s worth experimenting with if you’re feeling particularly flush. The canned Chipotles in Adobe Sauce give real pep to a chilli that’s just missing something. Paul is a huge fan of the Refried Chipotle Beans and the Mexican Breadcrumbs make awesome fish fingers (cut a small loin of cod into 3” x 1” pieces, dip into seasoned flour, beaten egg then the breadcrumbs, fry for 2-3 minutes until golden brown and deliciously most. Serve in white bread with lettuce and mayo).
But, aside from the hottest potato chips I have ever tasted (Death Rain Habenero Chips – seductively hot), the product I was most interested in, and finally got around to using last night, was the White Hominy.
On first impressions, Hominy looks as though someone dropped their popcorn into 7-Up, literally soggy popcorn. Not surprising as it is actually dried corn kernels, soaked in an alkaline mixture (originally wood ash) until the husks are removed. The resulting nude kernel is then ready for use. This process goes by the catchy name of Nixtamalization, but despite the retro-trendy moniker, Hominy has been prepared in this manner since 1200BC. Curiously, this basic chemical process renders the kernel far more nutritious (and easier to digest) than nature originally intended.
It has a distinctive smell that reminded me of the Mexican food aisle in American supermarkets, but when used in a spicy soup or stew, it lightens a dish with its not-unpleasantly bland flavour and boiled potato texture.
It was, then, with great pleasure that I could finally bust open this enormous tin of White Hominy for use in the aforementioned Green Chilli Soup.
The original recipe uses ground pork but I didn’t have any ground pork and I felt that pork loin wouldn’t have the necessary flavour (much too lean) for the soup. This, in addition to the long cooking time it would take to tenderise the meat to raggedy standards I usually employ, meant that I decided to use a chicken breast instead. It’s the healthy option.
What’s so special about this recipe, you’re wondering. How about, a soup so fragrant with chilli and coriander and cumin that you can feel it behind your eyes. Every spoonful makes you smile and feel peaceful whilst simultaneously exciting your taste buds. Don’t panic: I’m not slipping over to the hippy darkside, I just found the soup wondrous.
So, enough wittering, you’re all thinking. We just want the recipe. OK. But, one last piece of advice that I would urge you to take: the garnishes of the toasted pumpkin seeds and sprinkled feta cheese are not optional. The lactic bite of the cheese (you could use goats cheese too) and the crunch of the seeds are as intrinsic to the dish as the fresh coriander (cilantro), chillis or cumin.
Oh, if you can’t find Hominy, I’m not sure what else to suggest. Canned Sweetcorn would be too sweet and overpowering, chick peas which look similar but are too firm and nutty. Just order a can of Hominy from either of these two online emporiums (if you’re in the UK, that is), Lupe Pintos or MexGrocer.co.uk.


GREEN CHILLI WITH CHICKEN AND HOMINY (adapted from a recipe from Gourmet Feb 07)
Ingredients:
1 Onion, peeled and cut into quarters
1-4 Jalapeno Chillis (I used the 3” chillis you can get in the supermarket in the UK, but I wussed out and de-seeded it. My heat tolerances are on go-slow at the moment), topped and cut into large chunks
2 Cloves Garlic, peeled and squashed with the back of a knife
1 ¾ Cups Chicken Stock (fresh is best, but I used a stock cube)
1 Teaspoon Cumin (I had run out of cumin powder so I toasted some seeds and ground my own in a pestle and mortar – the smell was heady and intoxicating, everyone should try it)
½ Teaspoon Salt (or to taste)
400g Hominy, drained and rinsed
1-2 Chicken Breasts, skin on or off
Half a bunch of Coriander (cilantro) or a couple of tablespoons, chopped
3 Tablespoons Vegetable Oil
Feta Cheese for Crumbling
Toasted Pumpkin Seeds for Sprinkling
METHOD:
Throw the quartered onion, chopped chilli, squashed garlic and quarter cup of the chicken stock into a food processor or blender and puree until smooth.
In a frying pan, heat one tablespoon of oil and fry off the chicken breasts until brown on both sides, this should take about 3-4 minutes. Remove to a plate.
Add the remaining oil, heat over medium high heat and stir in the onion/chilli/garlic puree mush. It will sizzle frantically for a few seconds.
Cook over a relatively high heat until the liquid has evaporated, stirring frequently, about 5-10 minutes.
Add the rest of the stock, the chicken, the cumin, salt and hominy, stir well and leave to simmer gently for about 5 more minutes or until the chicken is cooked.
Remove the chicken from the soup and shred, using two forks. Return to the soup, stir once more and serve in large deep bowls, sprinkled generously with the feta cheese and toasted pumpkin seeds.
Enjoy!

p.s. Thanks to everyone for their kind messages (and special thanks for Ulrike for her lovely postcards from Europe!) - I've missed everyone and I feel buoyed and refreshed to be back and I can't wait to catch up on everyone's blogs!
reade more... Résuméabuiyad

Kitchen Parade Extra: Squash Puff ♥

Squash Puff, a favorite family recipe"How are you?" Yesterday, at church in my hometown in northern Minnesota, Pastor Rosanna suggested that this is a good week to answer something other than the customary "Fine", suggesting "Grateful". Today, I'm sitting in a small coffee shop (thank you to Linda from the Smiling Moon, to whom I'm much grateful for WiFi!) to post this and just heard someone just-arrived for Thanksgiving give a local a big hug. I didn't hear his question, but did hear her laughing answer, "Grateful."

And so I am, and so, I hope, are you. Only a few more days, now, til Thanksgiving. I love imagining your kitchens all abustle, giblets simmering on the stove, the frig spilling over with pre-Thanksgiving ingredients, busy-busy-busy.

Today I republish my Thanksgiving column from 2005. There's a recipe, yes, for squash puff, a long-time family favorite. But I hope the accompanying essay creates a moment of quiet reflection, of gratitude, in your busy-ness. I call it Freedom from Want.

Safe travels, good cooking, warm family gatherings ... to all.


SO WHAT IS KITCHEN PARADE, EXACTLY? Kitchen Parade is the food column that my Mom started writing for our family newspaper when I was a baby. Today it's published in my hometown newspapers in suburban St. Louis and features 'fresh seasonal recipes for every-day healthful eating and occasional indulgences'. Want to know more? Explore KitchenParade.com, including Kitchen Parade's Recipe Box!

WHY DOESN'T THIS POST ACCEPT COMMENTS? Because I hope that you'll click through to the actual column and comment there!

E-MAIL & RSS SUBSCRIBERS You may subscribe to Kitchen Parade directly, then you'll receive the complete column and recipe directly in your In Box or RSS reader. Just sign up for Kitchen Parade via e-mail or Kitchen Parade via RSS.

A Veggie Venture is home of the Veggie Evangelist Alanna Kellogg and award-winning vegetable inspiration from Asparagus to Zucchini. © Copyright 2007


reade more... Résuméabuiyad

Brussels Sprouts with Maple & Walnut Vinaigrette ♥

Easy prep beforehand, easy to cook at the last minute
Today's new Thanksgiving vegetable recipe: Fresh Brussels sprouts gently cooked and dressed in a simple vinaigrette, either a 'rich' vinaigrette for special occasions or a 'light' vinaigrette for every day.

Don't let me whine, but if there's one thing wrong with Thanksgiving vegetables, it's that so many recipes are laden with butter and cream and cheese and bacon and aloy! sugar. This means that if there are several vegetables on the table, they all sort of taste the same: rich and indulgent.

So I always like to make sure that there's at least one vegetable on the table that is spare and simple and yet totally full of flavor.

These Brussels sprouts are a perfect candidate, dressed in a simple vinaigrette with lovely flavors.

RECIPE for BRUSSELS SPROUTS with MAPLE & WALNUT VINAIGRETTE

Hands-on time: 15 minutes
Time to table: 30 minutes
Serves 8 (big servings, likely 16 for big Thanksgiving meals)

Salted water
2 pounds Brussels sprouts, trimmed and Xd

VINAIGRETTE
4 tablespoons sherry vinegar (lovely tasting stuff, this)
4 tablespoons maple syrup (use Grade B, yes B, for the most flavor)
1 tablespoon Dijon mustard
4 tablespoons walnut oil (the inspiring recipe called for 8 tablespoons, to my taste, 4 tablespoons is plenty rich)
Freshly ground nutmeg
Salt & pepper to taste

1/2 cup toasted walnuts

Bring water to a boil. Add sprouts to water, cover and cook for about 10 minutes (for small sprouts) or 15 (for large) or until a knife can be inserted easily into the center. (There's a fine line between under- and over-cooking Brussels sprouts. The more cooked they are, the easier it is for the vinaigrette to penetrate, so I err to the more-cooked version. Then again, I'm scarred for life from once serving Brussels sprouts so undercooked they rocketed across the room at the sign of a knife.) Drain and return to hot pan.

Whisk vinaigrette ingredients together. Toss hot sprouts with a portion of the vinaigrette, you may not need it all and it makes a great salad dressing too. Transfer to a serving bowl and top with walnuts.

NOTE: For every day, I'd follow my standard proportions of 1 pound of vegetables to 1 tablespoon of oil and in this case, use a splash of maple syrup and a dollop of mustard -- and skip the nuts.

TO PREP AHEAD
NUTS Toast the nuts 1 - 2 days in advance
VINAIGRETTE Mix 1 - 2 days ahead, then re-whisk before using.
SPROUTS Wash, trim and X the sprouts day before or morning of (if done day before, I think I'd spritz and cover with a damp paper towel until ready to cook)

LEFTOVER REPORT These reheat beautifully and so make for great Thanksgiving leftovers.


KITCHEN NOTES
HOW MANY BRUSSELS SPROUTS IN A POUND? There are about 50 tiny sprouts in a pound, only 17 - 20 large ones in a pound.
HOW TO TRIM BRUSSELS SPROUTS Wash the sprouts under running water. Slice off the stem end about 1/4 way into the sprout, then remove the outer leaves. Check to see that the remaining sprout is completely clean and the leaves unblemished, if not wash again and remove another layer of outer leaves. With a sharp knife, cut an X into the stem end, this helps the interior core cook at the same rate as the outer leaves.
Buy Brussels sprouts of roughly equivalent size so they cook evenly.
Frozen Brussels sprouts are -- okay -- but nothing close to fresh (and I promise, I love frozen vegetables in general)
To salt water for boiling vegetables, Epicurious recommends a scant teaspoon of table salt (more if you only have the less salty sea salt) per quart (four cups) of water but I use about double that
A good cook-ahead trick for any vegetables cooked or steamed in water: bring the water to a boil ahead of time, say 30 minutes or so, then cover and turn off the fire. When you're ready to bring the water to boil for real, it'll take far less time.

A Veggie Venture - Printer Friendly Recipe Graphic


Move aside, turkeys. (No, not you, dear readers! Thanksgiving turkeys!) Here at A Veggie Venture, vegetables are the real stars of the Thanksgiving table. So it's new Thanksgiving recipes all November long for a fabulous collection of Thanksgiving vegetable recipe ideas. Whether it's last year's famous World's Best Green Bean Casserole or a brand-new recipe which catches your fancy this year, move over turkeys, it's vegetables' time.

© Copyright 2007
reade more... Résuméabuiyad

Boozy Baked Celery ♥

Great celery flavor, enhanced with sherry or brandy[A warm welcome to all who are visiting A Veggie Venture for the first time! In November, it's all Thanksgiving vegetables, adding new recipes to build this year's collection of Thanksgiving vegetable recipes. But don't worry, in December and especially January, A Veggie Venture will return to its usual vegetable recipes, fast, low-calorie, easy to put on the table.]

Aii, how butter, cream and cheese turn prosaic celery into pure poetry! As it bakes, the kitchen fills the luscious aroma of sherry. Noses lift into the air, "What is that in the oven?"

It's ribs of celery in a creamy white sauce imbued with the essence of both celery and sherry (or brandy or maybe an anise-flavored liqueur like Sambuca?) and then topped with Parmesan. And oh my -- it is delicious.

KITCHEN NOTES
  • Darn those celery strings! Next time I will definitely strip the strings off the celery ribs before braising them.
  • The inspiring recipe calls for a whole stalk (yes a stalk, the whole big thing) of celery, shortened to an eight-inch length, then quartered while keeping the quarters intact at the root; this makes for an elegant presentation, especially in a rectangular serving dish. But to make the celery easier to eat without cutting, next time I will separate the individual ribs and cut into bite-size lengths.
  • There's enough sauce for at least one full stalk of celery.
  • This recipe is best for the celery ribs alone. But don't throw away the celery leaves - save them for a delicious celery and apple salad or this recipe for vegetable stock.
  • I hope my local Kirkwood reader is reading today -- she chides me when I forget about the difference between celery stalks and celery ribs. Repeat after me: a 'stalk' of celery is the whole shebang, the whole big head and a 'rib' is well, an individual piece of celery broken away from the stalk.


MAKE-AHEAD TIPS
DAY BEFORE - Braise the celery and make the sauce. Cover and refrigerate separately.
THANKSGIVING DAY - Bring the celery to room temperature. Rewarm the sauce til just bubbly. Top celery with sauce, top with cheese and bake for 30 - 45 minutes til hot clear-through.


MORE THANKSGIVING VEGETABLE RECIPES - CELERY
~ Lemony Creamy Brussels Sprouts & Celery - light 'n' lemony ~
~ Jealous Marys - a light apértif ~
~ Standing Veggies - an easy, attractive way vegetable tray ~

~ more celery recipes ~

~ more Thanksgiving vegetable recipes ~


BOOZY BAKED CELERY

Hands-on time: 20 minutes
Time to table: 1 hour
Serves 8

BRAISE THE CELERY
1/2 cup chicken broth (I used Better for Bouillon)
1/2 cup white wine or dry vermouth (I used sherry)
1 clove garlic, peeled and flattened with the side of a knife

1 whole stalk of celery,

Bring the liquids to a boil in a deep skillet.

Meanwhile, trim the celery, removing the root end and the celery tops. Remove the strings by running a vegetable peeler or paring knife along the outside of each rib. Cut the ribs into bite-size lengths. Drop into liquid, return to a boil, cover and braise for about 25 minutes or until soft. With a slotted spoon, remove celery from liquid. RESERVE THE LIQUID FOR THE SAUCE.

MAKE THE SAUCE
3 tablespoons butter
2 tablespoons flour (reduced from 3 tablespoons)
1 cup reserved liquid from braising the celery (supplement with skim milk if needed)
1/4 cup cream
Salt to taste
White pepper to taste
1 tablespoon brandy (I used sherry)

In a saucepan, melt the butter. Stir in the flour until smooth. (Do remove any lumps, otherwise the sauce will end up lumpy.) Stir for a minute or two until thickened. (Cooking for a minute at this stage removes any potential floury taste.) A tablespoon at a time, add the braising liquid, stirring to smoothly incorporate each spoonful before adding another. (This also avoids lumps.) A tablespoon at a time, stir in the cream, following the same process. Cook, stirring often, until thick, about four or five minutes. Season with salt and white pepper to taste. Stir in the brandy.

ASSEMBLE & BAKE
Braised celery
Sauce, rewarmed if necessary
2 tablespoons Parmesan cheese

Preheat oven to 400F. Arrange celery in a buttered baking dish. Top with sauce, then sprinkle Parmesan on top. Bake for 25 minutes or until hot clear through.


PRINT JUST A RECIPE! Now you can print a recipe without wasting ink and paper on the header and sidebar. Here's how.

NEVER MISS A RECIPE! For 'home delivery' of new recipes from A Veggie Venture, sign up here. Once you do, new recipes will be delivered, automatically, straight to your e-mail In Box.


Move aside, turkeys. (No, not you, dear readers! Thanksgiving turkeys!) Here at A Veggie Venture, vegetables are the real stars of the Thanksgiving table. So it's new Thanksgiving recipes all November long for a fabulous collection of Thanksgiving vegetable recipe ideas. Whether it's last year's famous World's Best Green Bean Casserole or a brand-new recipe which catches your fancy this year, move over turkeys, it's vegetables' time. © Copyright 2007


reade more... Résuméabuiyad

Spinach Casserole ♥

My friend Christi's grandmother's recipe for Spinach CasseroleWhen my friend Christi heard about my 2007 collection of Thanksgiving vegetable recipes, she offered her grandmother's recipe for a traditional spinach casserole. Sure! But reading the ingredient list of cottage cheese, cheese and eggs -- and only ten ounces of spinach -- I was fully prepared to not like it.

Even Christi, who has what might be called a 'theoretical' attachment to vegetables, says, "Our family spinach casserole recipe should come with its own paramedic." Or a heart defribrillator.

But friends trust friends and she made made me promise to try it 'just once' without modification. Thank you, Christi, for saving me from myself - this is a winner!

SPINACH CASSEROLE

Hands-on time: 15 minutes
Time to table: 60 minutes
Makes 3 1/2 cups

1/2 cup water
1 teaspoon table salt (or salt to taste)
1 10-ounce package frozen chopped spinach

3 eggs, whisked
3 tablespoons flour
16 ounces cottage cheese (I used a 1% cottage cheese from Pevely that is so creamy, you don't know it's just 1%)
4 ounces 'brick' cheese (Christi's grandmother cuts the cheese in 1" cubes)
4 ounces American cheese (same)
1/2 stick melted butter (Christi's family leaves this out and so do I)

Preheat oven to 350F.

Bring the water to a boil. Add the salt and let dissolve. Add the spinach and cook til done. Transfer to a colander and drain well. (Christi's mother uses a new potato ricer to drain the water from the spinach. I used the back of a spoon to press the spinach against the colander until it stopped expressing liquid.)

Meanwhile, in a large bowl, mix the remaining ingredients. Stir in cooked and drained spinach. Grease a shallow quiche pan or an 8x8 baking dish. Bake uncovered for 60 minutes or until top begins to brown.

TO PREP AHEAD
ONE or TWO DAYS BEFORE Mix the casserole but do not bake.
DAY OF Return to room temperature. Bake at 350F for an hour. Christi says the uncooked casserole can be frozen but should be fully thawed before baking.

LEFTOVER REPORT Warms up beautifully!


KITCHEN NOTES
Double the recipe for a 9x13 pan.
Do salt the spinach while cooking.
I wasn't sure what 'brick' cheese was and the grocery store didn't have any; so I used a Kraft mix of crumbled cheeses, cheddar, mozzarella and one other.

A Veggie Venture - Printer Friendly Recipe Graphic


MORE IDEAS for THANKSGIVING VEGETABLE RECIPES using GREENS
~ Gratin of Greens was the featured "spinach" recipe in 2006 ~
~ Noodles with Sour Cream ~
~ Orzo with Spinach ~
~ Spinach Puffs from my food column, Kitchen Parade ~
~ more spinach recipes ~
~ more Thanksgiving recipes ~


Move aside, turkeys. (No, not you, dear readers! Thanksgiving turkeys!) Here at A Veggie Venture, vegetables are the real stars of the Thanksgiving table. So it's new Thanksgiving recipes all November long for a fabulous collection of Thanksgiving vegetable recipe ideas. Whether it's last year's famous World's Best Green Bean Casserole or a brand-new recipe which catches your fancy this year, move over turkeys, it's vegetables' time.
© Copyright 2007

reade more... Résuméabuiyad