Pages

Two Soups

Split Pea and Ham soup and Miso Soup seem worlds apart, not only in distance, but in texture, flavour and content. However, I found myself making both of these soups recently as part of a self-enforced "healthy eating regime".
Let me elaborate. My husband’s penchant, when he is feeling healthy, is for plain boiled rice with soy sauce and miso soup in a teacup. Me, with my Irish tendencies, I prefer a more substantial soup, something a bit more rib-sticking. If it’s not Gumbo (only a soup in the very loosest sense of the word really) or Chowder then it must be Split Pea and Ham Soup.
I could wax lyrical forever about soup. My husband loves to bake bread, I love make soup, so it works out serendipitously. Furthermore, soup is so easy to make.
Miso Soup is possibly the world’s easiest soup (barring the ubiquitous cuppa-soup or any powder based soup that relies on boiling water from the kettle to rehydrate it): a spoonful of the paste into a pan of simmering water and that’s it: that’s your broth. Of course, I feel that Miso Soup benefits from some slithers of red-hot chilli and, to redress the balance, some fresh golden ginger root to sooth your world-weary stomach and some spring onion for colour and flavour. I have also, untraditionally, added bok choi, cut into raggy green ribbons and my husband loves silken tofu in his. I’m not a huge tofu fan generally but it works in this salty, savoury broth and sometimes your body just cries out for something nourishing.
Miso (fermented barley, rice or soy beans mixed with soy sauce) is a traditional Japanese ingredient that is also used to flavour meats and vegetables. When mixed with Dashi soup stock, it is called Misoshiru and is served with every meal. Miso is incredibly high in protein and vitamin rich so is a valuable aid for people on vegetarian diets too. You can also buy sachets of Miso powder to which you add water. These are not quite so rich in nutrients as the paste but convenient and tasty nonetheless.
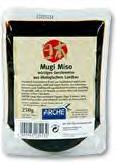
For the soup that I made on Monday night, we used Mugi Miso – made with fermented Barley.
MISO SOUP serves 4 generously
Ingredients:
2 Pints Water
Large Teaspoon Miso Paste
2 Spring Onions, chopped, including the greenery
1 or 2 Red Chillis, deseeded and cut into thin shards
½” Ginger, peeled into cut into strips
Pack Tofu cut into chunks
Some White Pepper
Soy Sauce and Sesame Oil for seasoning (optional)
METHOD:
Pour the water onto a saucepan, bring slowly to a gentle simmer and stir in the Miso Paste. Stir gently, the water will turn a very mahogany cloudy colour. Add the spring onions, chilli, ginger and tofu. Allow the vegetables and tofu to warm throw and flavour the broth for a couple of minutes. Taste and if you like, add some white pepper, soy sauce and sesame oil. Serve in bowls (or teacups) and feel instantly more virtuous.

And from a delicate, glass-like soup to an altogether more substantial soup: Split Pea and Ham. Just the name of it evokes big burly Rugby players chugging down gallons of the thick, green soup as opposed to gentle geishas daintily sipping broth.
Sometimes I enjoy soup so thick that the spoon stands up in it, like a guardsman standing to attention. I’m talking about good, hearty soups that could serve as a main course for a meal instead of a palate enhancing appetiser.
Of course, pulses being one of the first foods that man discovered he could preserve for time infinitum, split pea soup has been around for many centuries. According to Wikipedia, Aristophones writes about it in The Birds, which would date it at around 414BC. Pea Soup was sold in the streets of Athens as we today sell hot dogs or ice creams. I wonder why we lost favour in the soup? Probably the discovery of other, more interesting ingredients. As was then, is as now. Food comes and goes in waves and fashion.
Pea Soup is possibly one of the most famous and far reaching soups in the world. It is still served regularly in Denmark, The Netherlands, Finland and Sweden, where they are much more reverential about their food and history. It is seen far less often in the UK where we prefer our soups to be a little more exciting than plain old pea and ham. More’s the pity because a decent, homemade Pea and Ham soup is more flavourful and nutritious than anything out of a can and on those days when it’s cold and rainy and the last golden leaves are falling from the trees with only the suggestion of a breeze, you yearn for soup like this, a liquid version of pease pudding and bacon.
I used a recipe from Tamasin Day Lewis’ Kitchen Bible but I had run out of celery AND carrots (two things that a decent kitchen should never run dry of) but I made do with what I had (I had no option really, as I had already put the peas onto boil and I wasn’t about to waste them).
SPLIT PEA AND HAM SOUP, easily serves 4-6
Ingredients:
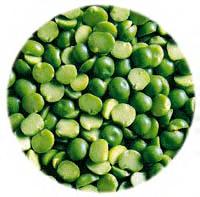
250g Split Peas (for that distinctive Exorcist colour, use green but I only had yellow in the house)
A Ham Bone (or, as I used, a small, cheap joint of smoked ham thrown in whole)
2 Sticks Celery chopped
2 Carrots, peeled and chopped
2 Onions, studded with 4 cloves
A Bay Leaf
5-6 Peppercorns
A Bouquet Garni comprising of some Parsley, Thyme and Rosemary
A Clove of Garlic, chopped
1 Litre Chicken Stock (I used fresh as I had some left over from the Coq Au Vin that I made, but you can use stock cubes)
1 Leek, outer leaves removed, sliced
Smoky Bacon rashers, cut into small pieces
METHOD:
In a large saucepan fry the bacon pieces off until they have rendered their delicious, salty juices and turned golden brown.
Turn the heat down and add the celery, garlic and carrots and cook until gently softened, about 3-4 minutes.
Pour over the chicken stock, add the split peas, studded onion, ham bone or joint and tuck in the bouquet garni.
Bring to the boil, skim off any scum (which is just proteins floating away from the meat), turn down and leave to simmer for between 30 minutes to an hour or until the peas are soft. At this stage you can season the soup. If you season the soup whilst you are cooking the split peas (or any pulses in fact), they will toughen up. You want them to be tender.
At this stage you can puree the soup. Remove the bone (or ham joint) and the bouquet garni. Pick out the cloves.
I do the processing in batches because my poor, feeble blender can only manage small amounts before it starts coughing and spluttering and asking for time out. I scoop out some of the bacon pieces and the ham joint (if using)
Anyway, pour the pureed soup into a clean saucepan, with the bacon pieces and warm through gently. Taste again for seasoning. You may find you want to dilute the soup if it’s too thick – use water or stock or some milk.
If you used the ham joint, rip this into pink shreds and scatter over the top of the soup as you serve it with some crusty bread (preferably homemade) and butter.
reade more... Résuméabuiyad

“Acorns were good till bread was found.” Francis Bacon

It has been suggested by my wife that I should write a weekly posting about bread. I didn’t exactly jump at the opportunity. It’s not that I don’t enjoy making bread because I really love it. And anybody who knows me understands that I love writing at least as much. The reason I’m not anxious to contribute a weekly post for this blog is that scheduling an hour in the kitchen once a week to make a loaf of bread is nearly impossible with Freya at the helm. You'll be lucky to see a Bread of the Month!

What upsets me about the current arrangement is that I’ve always considered the kitchen to be my domain. I’ve been cooking since my first spectacular failure making a grilled cheese sandwich when I was six years old. My mom never did figure out where that pan went! Most kids who take up cooking are inspired by a culinary tradition passed down from the matriarch, but not me. My desire to cook came from summers at home with a father who had absolutely NO skill in the kitchen. My desire to cook came from months of Campbell’s chicken noodle soup with grated cheddar on the top and a side of Saltine crackers with a thin smear of butter. In his defence, he has recently claimed that he was also capable of making Kraft mac ‘n’ cheese in those days.

After filing all the proper documents, a slot was cleared on Monday to do some baking. I have been enjoying the old Time-Life Good Cook series of books which Freya has been collecting recently. They're not a showcase for popular chefs; they're just very well structured how-to guides that cater to every skill level without being patronizing or overly complicated. My favourite is, of course, Breads. This book is packed with information about the history, the science, and the diversity of bread. The premise is fairly straightforward. Lots of styles of bread in the first half of the book and lots of recipes for dough in the second half. Choose a style, choose a compatible dough, and the permutations are infinite!

I decided to make clover rolls using a milk/butter dough. I have been eating clover rolls for years usually as part of holiday meals, but had never considered how they were made. From now on I'll always make my own.

CLOVER ROLLS (6-8 rolls)

Ingredients:
5 cups plain flour
1.5 cups warm milk
7g dry yeast
3 tablespoons butter
1 teaspoon salt
1 water filled spray bottle


METHOD:

1. Dissolve yeast in .5 cup of the milk and allow 10 minutes for activation.
2. Sift flour and salt in bowl. Rub butter into dry ingredients.
3. Add .5 cup milk/yeast to mixture and stir in with a fork. Add remaining milk and mix together until a stiff dough forms. Turn out onto a lightly floured work surface. Knead for 10-15 minutes until dough becomes elastic and firm.
4. Place dough in a clean bowl and cover with a damp towel. Allow to rise in a warm place for 1.5-2 hours. When dough has doubled in size, punch down, re-cover, and let rise for another 15 minutes.
5. Preheat oven to 450°F/230°C. Grease medium sized muffin tin. Pinch off golf ball sized balls of dough and roll between your hand to smooth. Align three balls evenly in each muffin slot. Repeat until all dough is used up.
6. Open the heated oven and give it several sprays from the water bottle to humidify. Place the rolls in the oven, cook for 15 minutes misting the oven every five minutes.
7. Remove rolls from the oven and brush with milk or butter.
8. OVER INDULGE!

My rolls came out of the oven well after 10PM. They would probably be more appropriate for lunch, but we didn't wait. Freya loved them with butter. For me it was a new Italian salami I purchased over the weekend. And they were just as good reheated the next day.

Coming Attractions: BEER BREAD (RATED R) and PIG IN A TROUGH (RATED G)

reade more... Résuméabuiyad

An Unusual Chocolate Cake


And because chocolate doesn’t really count as the fattening, artery thickening food stuff that I discussed in my previous post, here is a recipe for a cake that I made at the weekend, that, whilst it wasn’t great the next day (egg white rich cakes can become dry if not mixed with a little flour or butter), it was high on novelty appeal (for me at least): Chocolate Pumpernickel Torte.
I was fortunate in that we had some Rye Bread left over (and the recipe states you can use Rye if you don’t have pure pumpernickel and it is still difficult to locate around these parts). I love Rye Bread. I used to abhor the taste of the Rye or Pumpernickel Bread but many of you British readers will remember that, at one point, you could only get a close approximation of Pumpernickel in a brick sized slab which resembled neutronium. These days though, you can get some deliciously light Rye Bread, flavoured with Caraway Seeds, which is wonderful toasted or as the ‘jacket’ for my favourite American sandwich, the Rubens (or at least a close British approximation of it, using Pastrami instead of Corned Beef). What the bread does for this not-as-naughty-as-it-feels-dessert, is give it that delicate Caraway flavour which is incredibly unusual but very moreish.
Eastern European breads aside, this torte, which visually seems to imitate a sunken brick, is incredibly light and studded with nuggets of dark, dark chocolate and hazelnuts. It is a perfect dinner party dessert if you have gluten intolerant guests and would be best served with some single cream or crème fraiche and perhaps some raspberries (but not a redcurrant garnish!).
I culled this recipe from a wonderful book called the Chocolate Book by Helge Rubinstein, published in 1981. It is out of print for some unknown reason and deserves a reprint for it is a wealth of historical facts, dreamy chocolate data and out of this world recipes, including some savoury dishes using cacao. I strongly recommend this book for all chocoholics everywhere!
CHOCOLATE PUMPERNICKEL TORTE
Ingredients:
6 Eggs Separated
175g Caster Sugar
4 tablespoons Rum or Sherry
Pinch Salt
100g Pumpernickel or good quality Dark Rye bread
125g Dark Chocolate, good quality
25g Walnuts or Hazelnuts (optional)
METHOD:
Preheat Oven to 190c.
Whisk the Egg Yolks with half the sugar until pale and frothy. Whisk in the rum or sherry.
Whisk the Egg Whites with a pinch of salt until starting to softly peak. Pour in the rest of the sugar and whisk until peaking stiffly. It helps if you have an extra pair of hands at this point: one to whisk the whites and one to whisk the yolks other you do rather get repetitive strain injury (unless you use an electric whisk and I do recommend you use it if you have one!).
In a food processor (I had to do it by hand as I don’t have one!), finely chop the pumpernickel, chocolate and hazelnuts.
Fold the chocolate crumb mixture into the egg yolks thoroughly, then gently fold in, using a large metal spoon, the egg whites.
Pour into a well-buttered 9” springform tin and bake for about 25-30 minutes. I am deliberately vague about the times because the original recipe states the cooking time to be 50-60 minutes but after 30 minutes it had started to fragrance the kitchen and it had just caught around the edges. However, my oven is more temperamental than a cobra in a sack so I always have to err on the side of caution. I suggest checking after about 25 minutes or when you start to smell it cooking.
When you think it’s done, open the oven-door, turn off the heat and leave to cool completely. It will sink in the middle and look dark on the outside but when you cut into it, it will be a pale, open-textured sponge, studded with the chocolate/Pumpernickel crumb. Serve in small slices with single cream and raspberries.
reade more... Résuméabuiyad

A Temporary Resolution and The World's Best Coq Au Vin

Despite the short holiday that my husband and I just had off work and the not insubstantial amount of time spent cooking, I feel that I didn’t really produce anything that was worth writing about, other than the Key Lime Pie and the Coq Au Vin (and I’m not too modest to announce that the recipe I use for that most famous of all French dishes is superlative, albeit untraditional).
I spent much time over the weekend cooking and I now have a freezer and cupboards stuffed with new ingredients, cuts of meat and snappily fresh vegetables but sometimes you just hit a slump. My last such lapse was on return from America when I was heavily jetlagged but since I regained those lost hours, I haven’t stopped cooking (or writing) since. My husband summed up this latest fug quite succinctly when he noted that his stomach had stretched from eating so much food and even when it’s empty it feels full. Aha! So, we’ve reached that point. We’re overfed like the 40lb Thanksgiving Turkey that my mother-in-law prepares each year, carrying around our bloated bellies stuffed with rich carbohydrate-laden foods. Take last night’s supper for example: Goulash. A simple, Hungarian peasant dish, I hear you cry. But no. We diced potatoes up and threw them into the meat stew for bulk. We added flour and egg dumplings because they’re traditional but mostly just because we like them. We served the Goulash on a (large) bed of fluffy white rice. We used Paul’s homemade trefoil milk rolls to mop up any stray sauce that had escaped the prying grains of rice. We then dolloped tablespoons of sour cream atop the whole sorry plateful, which really was an insulting imitation of the original dish. We ate, and then ate some more and then complained because our stomachs were in deep, deep pain from the constant onslaught of meat, potatoes, rice, bread, dumplings. It is more than any human stomach should be expected to consume in a lifetime and we ate it in one sitting.
Now, I know that you’re thinking “well, everyone overeats from time to time” and you’d be right. But remember that I’m a food writer so my ability to write is based on my ability to eat and therefore to cook. My husband is an innocent, who used to have a waistline, caught up in my obsession (which I think he secretly enjoys and even covets for himself). And, with Christmas looming at a terrifyingly rapid pace, we need to reign in our appetites (and hopefully our belts) to prepare ourselves for the festive onslaught, which will no doubt include puddings, pies, cakes, sweets, nuts, roast meats and sandwiches.
Don’t misunderstand me. This isn’t a call to arms. I’m not laying down my butter or other saturated fats without a fight, I’m just cutting down the portion sizes and the calorific intake. It will be an interesting exercise just to see quite where we can reduce the fat and replace with healthier options. Sounds boring but I will ensure it will be far from it.
Tonight we start with Miso Soup with Silken Tofu. A yummy, nourishing broth that is as life-giving as it is soul-soothing.
I shall keep you posted.

In the meantime, here is my wonderfully rich and artery clogging recipe for Coq Au Vin. Actually, this isn’t my recipe as per se, but one I tested for Cooks Illustrated some months ago. It really is very good and utilises a method for tenderising and bringing the optimum flavour to what can be sometimes bland chicken breasts – rapid brining.
COQ AU VIN – Serves 4 generously
Ingredients:
Four Free Range Organic Chicken Breasts, sliced in cut into quarters. If the breasts come with fillets, leave those as they are.
Four Free Range Organic Chicken Thighs, skinned and bones (you can buy them ready prepared)
1 Bottle of a Light, Fruity Red Wine, my husband selected Pinot Noir - he’s the wine buff, not me!
2 Cups Chicken Stock (for a dish like this, I would strongly recommend using homemade stock and it is really easy to do with some a pack of cheap chicken wings and an onion, halved carrot, stick celery and bouquet garni)
Bouquet Garni, comprising about 10 sprigs Parsley, couple sprigs Fresh Thyme, Couple Bay Leaves
Fresh Chopped Parsley (for garnishing)
4 Rashers Unsmoked Bacon (don’t use streaky but don’t use one that’s really lean either as you need some of the fat), chopped
30g Butter
20 or so Shallots or Silverskin Onions (I seem to find it impossible to find these little onions outside of the pickling jar)
400g Small White Mushrooms, halved or left whole, up to you
2 Cloves Garlic, finely chopped
1 Tablespoon Tomato Puree
2 Tablespoons Plain Flour
Seasoning
METHOD:
Peel the little onions and put to one side.
Pour the whole bottle of wine (save a glass for cook if you’re feeling harassed or resentful about having to use ALL this wine) into a saucepan along with the chicken stock and bouquet garni. Bring to the boil then turn down to a medium simmer. You will need to reduce this down to about 3 cups. This will take roughly 25 minutes whilst you prep the chicken and other vegetables.
In a plastic bag, pour half a cup of cold water, along with half a teaspoon of table salt (not sea salt) and shake well to dissolve the salt. Add the quartered chicken breasts to bag of briny water and seal. Squidge the chicken about in the bag, making sure all of it is has been coated with the brine. Refrigerate for between 30-45 minutes (basically until you need it).
In deep saute pan, fry the bacon over quite a high heat to brown it and render down the fat, about 6 minutes. Do not let it burn or else the fat will just evaporate.
Using a slotted spoon, remove the bacon to a plate. Turn the heat down to medium and, after seasoning the chicken thighs, fry them off, folded in half, in the bacon fat, until browned but not cooked, on both sides. Remove to a plate.
In the same pan, turn the heat up and melt a tablespoon of butter. Throw in the onions and mushrooms into foaming butter. Cook for 7-8 minutes until browned and the onions are starting to soften. Maybe 7-8 minutes.
Now turn down to medium and stir the chopped garlic into the mushrooms and onions. Cook until fragrant, about 30 seconds. Stir in the tablespoon of tomato puree, mix to coat everything then add the remaining butter and two tablespoons of flour. This will give you a thick and glossy sauce.
Now pour in the drained and reduced wine (discarding the bouquet garni), the bacon, the chicken thighs and a good, generous grinding of fresh black pepper. Stir well, cover and leave to simmer for 15 minutes.
After this time, remove the chicken breasts from the brine and add them to winey/chickeny/bacony/mushroomy/oniony brew and cook for another 10 minutes.
Using a slotted spoon, remove the chicken pieces and keep warm on a separate plate whilst you reduce the sauce. Turn the heat up and bring to a rapid simmer. Taste for seasoning. You may find it needs some salt, or more pepper. It might not need much reducing, anything between 5 and 10 minutes should be enough to give you a thick, glossy, unctuously savoury sauce.
Return the breasts to the sauce, strew over some chopped parsley and serve with Colcannon (mashed potato with cabbage and spring onion simmered in milk), Green Beans or Peas.
reade more... Résuméabuiyad

Wine Flour Article

Click here for my article of Wine Flour, published by Wine Sediments at the Well-Fed Network!
Food (or rather Drink) for thought.
reade more... Résuméabuiyad

Key Lime Pie


Key Lime Pie is the perfect dessert following a rich, unctuous dish like Coq Au Vin. It is terribly simple and can be made well in advance of the meal, even the night before.
The Key Lime Pie – the official pie of Florida - first originated in, where else but the Florida Keys, where the Key Limes grow sporadically. True Key Limes have a more distinctively sour ‘limey’ taste than the ones we can buy in the supermarket.
The plantations that grew the limes were destroyed back in the 1920s so the limes (which resemble small lemons with little green patches) are only found in the back gardens of a lucky few these days. The limes that were replaced in the plantations are, in fact Persian Limes and do not have that rare flavour – more lime, than lime itself it is said.
Condensed Milk was used in the pie filling instead of regular milk because of poor refrigeration back in the late 1800s, when the pie was first produced. The discovery of Condensed Milk must have been greeted with much enthusiasm in those days before heat-treated milk (and fridges).
For this particular recipe, from Tamasin Day-Lewis Art of the Tart, I used shortcrust pastry but you could go even simpler and mix some crushed Digestive crumbs with some butter and press that into a pie tin. If do intend to do this, make sure to use a smooth edged cake tin instead, not a scalloped or crimped pie tin, because, quite simply, you won’t get it out of the tin without lots of mess and tears. Of course, if you are making a shortcrust case, you don’t need to worry.
The filling is painfully easy, just three ingredients: eggs, lime juice (use fresh, not bought) and my current favourite cupboard standby, Condensed Milk. These are whisked together, poured into your pie-crust and baked until it is tummy-wobble soft. If, like me, you happen to touch the top of the pie with over-sized oven gloves when removing it from the oven, don’t worry too much about marring it because you can either dust it generously with icing sugar or envelope it in some sweetened whipped cream for a truly luxurious finish.
If you decide just to dust it with icing sugar, then you can offer some pouring cream around for your guests: the fatty cream is a lovely foil against the wonderfully tart filling.
KEY LIME PIE
Ingredients:
9” Shortcrust Pie Crust, fully baked, using 110g flour, 55g Butter, pinch salt – See My Shortcrust Recipe OR make a Digestive Biscuit Base using this Cheesecake Recipe instead.
1 400g Tin Condensed Milk (they actually come in 397g I believe but it’s the same thing)
4 Egg Yolks (freeze the egg whites if you’re feeling frugal)
150ml Freshly Squeezed Lime Juice (this constitutes about 5 limes. To get the maximum juice from them, roll them firmly against a work surface to break down the segments).
Zest of one Lime (I use a Micro Planer)
METHOD:
Preheat the oven to 180c.
Whisk together the egg yolks and condensed milk until smooth. Slowly pour in the lime juice, stirring all the time. The mixture will tighten up because of the acidy limes reacting with the eggs and condensed milk so do it carefully (Note: back in the olden days, the pie wouldn’t even be cooked, the cook would rely on this chemical reaction to make the filling naturally thick, obviously today people are squiffy about eggs so prefer to cook it to a Quiche-like consistency). Stir until smooth, then whisk in the zest.
Pour into the pour crust.
Bake for about 20 minutes or until it is wobblingly set.
Leave to cool on a wire rack then refrigerate for at least 2 hours (although we could only manage one!). If you like, cover with a 284ml carton of double cream, whipped together with a tablespoon caster sugar (this stabilises the cream and stops it spoiling quickly – in fact, ours was still good two days later) and decorate with some lime zest.
Or, simply dust with some icing sugar and serve with pouring cream.
reade more... Résuméabuiyad

Book Cover of the Week


My husband and I have had a few days off work to complete some jobs around the house, hence the slight lapse in regular postings on here. I have also been writing some articles for the Well Fed Network including one on an interesting new product, Wine Flour, which holds a lot of potential, not only for health benefits but also for flavouring breads and pasta. I am withholding judgement until the manufacturers decide to test the European market but rest assured it will probably be one of my Unusual Ingredients of the Month.

So, a little belatedly I admit, here is my Book Cover of the Week, actually a magazine cover: Gourmet Magazine, November 1941 Thanksgiving Issue.
I love Gourmet Magazines from this era. Henry Stahlhut, the artist who painted all of Gourmet's issues until his death in the mid 50s, obviously relished his task of replicating the food he and the writers for the magazine were expected to eat. Therefore, there have been some interesting cover choices: a whole calf's head, decorated with flowers for New Years, black brains and butter, just because it was one of his favourite dishes; his work is that of a consummate professional, you just want to rip the cover right off and serve it for supper - either that or frame it and hang it on your kitchen wall. I have yet to find a food magazine that features photography on the front cover that captures the impact and class of Stahlhut's Gourmet covers but then, they are from a different time, food was different, the way we ate was different. I love them because they are beautifully nostalgic.
On another note, I have been busy baking this weekend and have come across another Unusual Product: Agave Nectar which is a natural sweetener with the lowest glycaemic index of any sugar based product, including honey AND it is sweeter than sugar itself. I have several diabetic members in my family, notably my mother-in-law and my grandfather, both of whom have to inject insulin daily so this is of great interest. My grandad( who has been a diabetic for nearly 20 years has only just started injecting insulin, having previously controlled the illness with oral medication) has to be particularly strict at the moment but this is painful for him as his sweet tooth (inherited by myself) is a constant reminder of what he might be missing! There are many recipes online so I intend to spend some time this week experimenting with the Agave. It is also beneficial for people who have intolerances to regular sugar.
Happy (late) Thanksgiving!


reade more... Résuméabuiyad

A Surprisingly Good Cake


I was browsing through one of my favourite series of cookbooks, the Wooden Spoon, written and compiled by Marilyn M Moore. Her books are not just a collection of recipes but a series of reminiscences from her upbringing in the Amish/Mennonite community. We Brits have a secret love for the Amish way of life and that people can still maintain those old-fashioned values and maybe benefit from a simpler way of life.
Moores’ love of her community is prevalent throughout her books and it is that sense of community that we seem to be losing. Local fairs and fetes almost seem to be a thing of a past, a relic from when people had the time to bake twenty cakes and dozens of cookies for huge family get-togethers.
I am not suggesting that we all become superwomen (and supermen) and start to churn out cake after cake or become fully subscribed members of the local W.I. The point is that most of us have a family member or neighbour who might benefit from an unexpected treat, particularly at this time of the year.

OATMEAL CAKE
This unusual cake is made incredibly tender through the addition of the oatmeal but, like the Swedish, Toscacaka, the hot icing is baked on, which makes it a dream for people who are dextrously challenged (such as myself). It cools to a crunchy, toffee flavoured finish.
Oatmeal Cake is extraordinarily moreish and makes an ideal traybake cake for parties.
Ingredients:
Cake:
1 cup uncooked old fashioned oatmeal (not instant)
1 ¼ cups boiling water
113g vegetable shortening (we used Crisco)
¾ Cup Granulated Sugar
¾ Cup Light Brown Sugar
2 Large Eggs
1 Teaspoon Vanilla Extract
1 ½ Cups Plain Flour
½ Teaspoon Salt
1 Teaspoon Baking Powder
1 Teaspoon Ground Cinnamon
¼ Teaspoon Ground Nutmeg
Icing:
85g Butter
¼ Cup Evaporated Milk
1 Teaspoon Vanilla Extract
1 Cup Light Brown Sugar
1 Cup Sweetened Flaked Coconut (optional)
1 Cup Chopped Pecans (optional)
METHOD:
Preheat the oven to 175c
Grease a 9 x 13inch baking pan or two 5 by 5inch pans.
Pour the boiling water over the oatmeal and leave to cool slightly whilst you get on with the rest of the cake.
In a mixing bowl, beat the shortening with the granulated sugar until light and fluffy.
Add the Brown Sugar and beat until fluffy again.
Add the eggs and beat in, one at a time, until combined.
Stir in the oatmeal, then sift in the flour, baking powder, cinnamon and nutmeg. Stir this in gently but thoroughly.
Pour into the prepared baking pan(s).
Bake for 25-30 minutes or until a skewer comes out clean.
5 minutes before the cake comes out, prepare the icing. Melt together the butter, evaporated milk, vanilla extract, sugar, coconut and pecans until combined.
Pour over the baked cake(s) and place under a hot grill until it starts to bubble and brown. Leave to cool completely before cutting into squares and serving at coffee time (or for breakfast - it does have oatmeal in it, after all!).
reade more... Résuméabuiyad

Well Fed Network - New Article

Click here to read my latest article for the Well-Fed Network. This time it's posted under the Paper Palate Site and if anyone should know about cookbooks, it's someone who is literally drowning beneath them, i.e. Me (or my tolerant husband!). Actually, the article is about my top five British writers so let me know if you disagree with any of them!
reade more... Résuméabuiyad

Unusual Ingredient of the Week - Fluff


Yes Fluff. Not bellybutton fluff or fluffy Easter Chicks, but just Fluff.

If you're American you will know exactly what I mean. If you're British, you will have been denied access to this most sickly sweet of all confections.

Fluff is white and, well, fluffy. When you peer, bleary-eyed and more than a little unravelled, out of an aeroplane window after 7 hours in the sky, you see fluff. If only you could open the window, you could step right out onto it, hopping from one fluffy cloud to another, pausing only to grab a sticky handful of....Fluff.

By now you are probably crazed with curiosity as to what Fluff actually is. Well, remember how when you were a kid, your mum would give you a teaspoon of Lyle's Golden Syrup if you had a sore throat or if you'd been whining for some chocolate? Golden Syrup is pure inverted sugar syrup. If you had a more health conscious mum, you might have had a teaspoon of honey instead. American kids have a far more exciting sickly sweet tooth-rot in a jar - Fluff. Or, in other words, Marshmallow Fluff. Yes, marshmallow fluff.
It is exactly what it says. Marshmallow in cream form. Apparently, a nationwide famous American sandwich is the Fluffernutter - peanut butter and Fluff. That's peanuts and marshmallow. In A Sandwich.

I have seen the retro styled jars (apparently they have not changed the artwork since Fluff's inception over 75 years ago), lined up on the shelves in American supermarkets and had to be physically restrained from purchasing it for fear of it becoming another disused pantry item (see below).

Ahh, well the Fluff can run but it can't hide. Yesterday I found it for sale in that oldest and most respected of supermarket institutions - Sainsburys. For £1.65. I furtively snatched a jar off the shelf and tucked it surreptitiously under the healthy vegetables and organic chicken that I had bought. I coveted Fluff and I got it.

Actually, all shame aside, as a very special treat, Fluff, just like Schmaltz or Kentucky Bourbon, has its place in every kitchen. It can be used as a sticky but traditional topping for Thanksgiving and Christmas Sweet Potatoes. Us Brits balk at the idea of serving something sweet like marshmallows with our meat and gravy but it actually is really very good. And you are getting some vitamins from the sweet potatoes.

You can also make Whoopie Pies which have a different connotation here but the name apparently alludes to children exclaiming 'whoppee!' when they see them being served. Whoopie Pies are soft chocolate cookies filled with a cream made with - wait for it - Fluff, sugar and butter. And some Vanilla Extract for extra nutrition. Well, no one ever said that chocolate filled cookies had to be packed with healthy goodness.

I have an intention for the Fluff that I briefly mentioned in an earlier post: Grasshopper Pie. Whilst researching this retro diner pie, I found various methods of preparing it, but the most prevalent is the one that combines Fluff with Peppermint Extract, topped with Dream Whip. Possibly the most chemically inhanced dish ever. Because all the elements of this dish scream of the atomic age, the use of consumer-convenient products, the space-age lime-green colour and the bad taste name (after a cocktail), I have to make it the way 1950s housewives all over America would have made it. This pie has the potential to be even easier than my previous world's easiest pie, the Banoffi.

I shall keep you posted.
reade more... Résuméabuiyad

The Store Cupboard


I don't like to preach to initiated. If you live in England you will know what it's like to reach the end of the month and be poor. Without going into the politics of the situation, I think it's prudent to have a heaving store cupboard, packed with deli-style goodies that you purchase when you're feeling a bit more flush (the first 2 days of the new month) and that will serve you well when you're just about at the end of your culinary and financial tether.

Of course, everybody has different tastes so what you tuck away in your cupboard, or plastic storage box, or drawer, whatever constitutes your pantry, behind the tinned tomatoes and flour, will all be down to you. Here is a rough list of ingredients that I have recently found indispensible in the kitchen, and I have, for the most part, listed the odd recipe here and there utilising these ingredients. I'm not suggesting that you should rush out and recklessly buy the first recherche item that you come across (I'm here to make that mistake on your behalf...) but seriously, as my Unusual Ingredient of the Week series will attest to, some of the most unusual ingredients can become as useful as a pot of sour cream or bottle of vanilla extract.

What these unusual ingredients achieve is making you feel like you are eating a proper decent meal and not just the scrapings from the back of the fridge. Very important at the end of the month.

1) Anchovies. Not the most exotic item in the world but many people are scared off by it's 'love it or hate it' reputation. No, I don't have anchovies on pizza, nor could I eat them straight out of the jar or tin but they do add an indefinable savouriness to a dish. Melted into sauteed garlic with tomatoes, they form the backbone of that infamous Spanish dish, Pasta Puttanesca (see below for recipe). I have chopped them finely and used them as part of a dressing for a hot salad (toasted pecans, crumbled streaky bacon, poached egg and soft salad leaves) and seasoned a broccoli tart with them. Unless you have an anchovy-intolerant friend, try secreting it in a dish and asking your guests to guess the secret ingredient. They will probably be pleasantly surprised (if not reformed of their anchovy phobia).

2) Capers. Preferably buy a small jar of the salted ones. It does seem like an expense but they last ages and taste so much better than those preserved in brine that become soggy and a bit sour. Capers can be chopped up and stirred into creme fraiche or mayonaisse with some seasoning and a squirt of lemon to make a lovely homemade tartare sauce - perfect with fish fingers (remember, this is the end of the month!!). Again, they are an essential part of Pasta Puttansesca. I recently made a yummy butter with capers and finely chopped shallots that I slathered on bread and topped with fish roe (another super-cheap food item). Capers can be used to spruce up all manner of salads, hot tomato sauces etc.

3) Salsa Truffina. I have made mention of this item on two separate posts, Truffle Chicken and Truffle and Spinach Triangles. It could also be stirred through some freshly cooked pasta or risotto to add a deeply earthy flavour. My husband spreads omelettes with a smear of it and tops them with sauted mushrooms.

4) Dukkah - Not really an ingredient so much as a seasoning. This makes a really cheap but moreish starter if you serve little bowls of olive oil and ripped pieces of bread with it. You can also sprinkle if over salads to add a little bit of crunch.


5) Spice Mixes. In the UK, Seasoned Pioneers do a wide variety of reasonably priced spice mixes (including the aforementioned Dukkah), that can be rubbed onto fish, added to marinades for chicken or used to flavour roast pork. These are incredibly useful and can elevate any good dish, into something really good.

6) A Herb Box. Not really unusual at all but if, like us, you have a miniscule garden or no garden at all, you can easily buy a selection of herbs from your local garden centre, plant them up in a small trough, keep them near the light and water them regularly. For your small act of kindess, they will repay you tenfold by supplying you with a constant source of what could be the chef's most important ingredient - the herb. I always associate the smell of rosemary with my mum's roast potatoes, mint with summertime and parsley with just about any Italian pasta dish that I prepare. Fried sage leaves are great on risotto and Thyme leaves can be used to delicately scent a roast chicken.

7) Tappenade. Or Olive Paste. Useful in the same way as the Salsa Truffina, you can spread it on Bruschetta with some fresh tomatoes, stir it into pasta or, as my husband uses it, mixed in with tuna for his daily sandwich! It can also be used instead of mayonaisse or butter on bread. It proved it's worth when I stirred it into the Puttanesca - we didn't have any fresh olives. Not quite the same but it gives you a flavourful, chunky sauce.

Anyway, this is just a sample. I could have added Nanjing Black Rice, Gelatine Leaves or Pinhead Oatmeal. If you have any mysterious jars that have been lurking in your cupboard for so long that you need to dust off the label to read what they are, try doing a search online for some inspiring recipes or go out on a limb and just experiment!

Here then is a recipe for Pasta Puttanesca, using several of the above ingredients:

Pasta Puttanesca is translated in several ways, tart's pasta, harlot's pasta or whore's pasta so I think we can get a rough idea of it's origins: Italian 'Ladies of the Night' prepared this dish for their customers (thanks to Simona at Saffron and Pepper for the heads up - I originally thought it was Spanish even though it clearly sounds Italian!!). It is a quick and cheaply produced dish that is nourishing and very, very tasty.

PASTA PUTTANESCA serves 2 hungry and beleagured people.
Ingredients:
500g Spaghetti
5 Tablespoons Olive Oil
3 Cloves Garlic, finely chopped
3 Sage Leaves, shredded
Sprig Fresh Rosemary, chopped finely
Tablespoon Chopped Parsley
Large Pinch Dry Oregano
Pinch or two of Chilli Flakes
Tablespoon Capers, rinsed and drained
5 or 6 Anchovies, chopped
20 or so Olives of your choice or a heaped teaspoon of Tappenade in a pinch.
Can tomatoes, drained of liquid (or use 350g chopped fresh tomatoes)
METHOD:
Heat the oil gently in a saucepan. Add the garlic, anchovies, sage and rosemary and cook for a couple of minutes until fragrant. Do not allow to brown.
Stir in the tomatoes, breaking them up gently with the back of your wooden spoon. Add a pinch or two (depending on how hot you like it!) of chilli flakes, pinch of oregano, and the capers. Season lightly with salt, heavily with pepper. Simmer for 10 minutes.
Meanwhile, cook the spaghetti as per the instructions on the packet.
Drain the pasta and pour into a large, warm bowl. In two lots, stir through the puttanesca sauce, ensuring that all the pasta is well coated.
Serve with some grated parmesan (optional), crusty bread (also optional) and large shovels (for applying to the mouth..)
reade more... Résuméabuiyad

An End of The Month Supper


It doesn’t seem fair somehow. The higher your profile and the larger your bank account, the more free stuff you’re given. I mean, I bet Nigella Lawson or Delia Smith don’t have to pay £70.00 for a Kelly Bronze Turkey or a pig from Jimmy’s Farm. Sure, they might plug the odd organic shop here and there but I’m always advertising people’s wares on this here blog and what freebies do I get? Nowt so much as carpal tunnel syndrome, that’s what.
Anyway, that’s my complaint for the day.
Actually, it’s nudging the end of the month (although not quickly enough) and therefore payday, but until that glorious day when my Amazon account will open it’s cyber arms to greet me once more like the prodigal daughter, we are resigned to living on freezer burned fish and bits of cheese that resemble the Sahara Dessert.
Contrary to popular belief, you can actually make a really rather good dish with a dried up piece of cheddar and some frozen cod. Throw in some peas and potatoes that are beginning to sprout and you have, in fact, a poor mans’ fish pie. Don’t let my demoralising moniker put you off: this is a nutritious, one dish pie that takes no time at all to prepare and fools you into thinking that you’re eating something really rather luxurious, instead of the reality, which is that most of the ingredients had to be chiselled off the back of the refrigerator.
This pie can be tarted up in all sorts of ways. I have spread green beans or cooked spinach in the bottom of the dish, kids really love sweetcorn stirred into the sauce and you could switch around the fish as your budget or freezer allows. Prawns and scallops are, of course, particularly awe-inducing in a Fish Pie.
POOR MAN’S FISH PIE
Ingredients:
2 Large Potatoes (preferably white bakers), peeled
2 Fillets of Cod (or any other flaky white fish that you have in the freezer, do feel free to throw in some prawns if you feel like really going crazy)
Half a Leek, sliced thinly
Pint of Milk (I used skimmed because that’s what we drink, but for a more luxurious sauce, try full fat)
Some Butter
About an ounce of plain flour, preferably "00"
Cheddar Cheese
Seasoning
Handful of Frozen Peas or Sweetcorn (optional)
METHOD:
Preheat oven to 200c.
Chop the potato into large chunks and put into a pan of lightly salted water. Bring to the boil and simmer until a knife point pierces them easily. Drain and mash them with a little butter and milk. Season.
While the potatoes are cooking, poach the fish. In a deep frying pan, pour the milk, along with a bay leaf and some peppercorns. Gently lay the cod fillets, skin side down, in the milk and bring to a gentle simmer. Cover with foil and let simmer for about 10-15 minutes, or until the skin comes easily away from the fish when you ease it with the prongs of a fork.
Strain the milk into a mixing jug and reserve to one side. You will use this to make the white sauce.
Gently flake the fish into a bowl, taking care not to break it up too much, you want to come across lovely white flakes in the sauce. Discard the skin or give it to your dogs (mine love it and fish skin is good for their joints and skin).
In a small saucepan, melt together 1oz of Flour and Butter until it has formed a pale yellow paste. Gradually pour in the reserved milk, whisking to ensure that all lumps are destroyed like the annoyance they are. Add more regular milk if the sauce looks like it’s getting too thick. Grate in some cheddar cheese and season until it tastes good to you. Cook over low heat for a few minutes more to cook out the floury taste. Stir in some frozen peas or Sweetcorn if desired.
Scatter the flaked cod into the bottom of a small (about 9” dia) baking dish. Pour over the sauce making sure to envelope the fish completely.
Dollop over the mash and roughly even out with the rake of a fork or a pallet knife if you’re feeling fancy. Sprinkle with some more grated cheese, dot with butter, and if you’re in super-retro mode (and let's be honest, who isn't?), add a slice or two of tomato, just like mum used to.
Bake in oven for about 15-20 minutes or until golden and bubbly. Serve with nothing or some green beans.
reade more... Résuméabuiyad

Truffle Chicken

Regular readers of this blog will be aware of my love for that most knobbly and odourous of all fungi, the truffle. Whilst I cannot afford the real thing, whole, at least until my dog sniffs one out that isn’t riddled with truffle-sozzled maggots, I make do with Salsa Truffina which affords me a hint of the real thing and goes quite a bit further.
After the success of the Spinach and Truffle Triangles, I was keen to try this pungent, mushroom-laced paste again. This weekend was that time.
My husband bought me a copy of Rick Stein’s latest book, French Odyssey, which accompanied his BBC2 show. During the course of the six episodes Stein travelled around France on a barge, experiencing every facet of French cuisine. His reverence to such food luminaries as Elizabeth David and Richard Olney are clear throughout the show. He loves French food and has no reservations condemning British cuisine for slipping by the wayside. He is quite right too. We do not love our fresh produce in the same way that the French do. We are more than happy to buy all our edible groceries, from meat to fish to veg from our local supermarket rather than support local farmer's markets and fishmongers and local butchers. My hometown has not had a fishmongers since the 80s and the two greengrocers that were once the hub of the town were driven out of business by big supermarket chains like Co-Op. Unfortunately, convenience over good taste has won out.
Yes, the supermarkets do have a wide variety of organic produce nowadays but, as with any big conglomeration, they are buying produce from the farmers at very low prices and then selling them to the end user for hugely elevated prices. It is important to buy locally produced goods from farm shops or markets otherwise this situation cannot sustain itself. The farmers will be unable to keep producing good quality organic food for a pittance. This is the same scenario for butchers and fishmongers, many of whom send their fresh produce abroad where it is appreciated.
Many local producers are bypassing the supermarkets altogether and are selling their organic produce over the internet. You can get whole pigs, jointed, sent to you once a year, and you can remain secure in the knowledge that only the day before, your lovely shoulder of pork was part of a pig, snuffling peacefully around in the mud, eating acorns.
Weekly or monthly fruit and vegetable box schemes are a great idea for people whose nearest organic supplier is too far to travel to. They deliver to your doorstep for a nominal fee and you are guaranteed that the goods delivered are as fresh and locally picked as possible.
Anyway, back to the chicken. A good organic chicken is stuffed with a mushroom and truffle mix, just under the skin, which works in three ways: it flavours the chicken, it keeps the breast moist and it crisps the skin. It is very simple but looks (and sounds) impressive enough for special guests. We served it, as recommended by Rick Stein, with a simple Risotto Bianco, flavoured with the cooking juices from the chicken, and a delicate, leafy lambs lettuce salad – no dressing necessary. The leaves are just to cut the richness of the truffle and the risotto.
TRUFFLE CHICKEN, serves 4
Ingredients:
1 Organic Chicken, about 1.5kg
1 Shallot, chopped very finely
1 Clove Garlic, chopped very finely
100g Chestnut Mushrooms, chopped very finely
1 Tablespoon Salsa Truffina
2 Teaspoons Truffle Oil (available at a quite reasonable price in most supermarkets, a little goes a long way, try it drizzled on Jerusalem Artichoke Soup)
Tablespoon Parsley, finely chopped
Seasoning
45g Butter
METHOD:
Preheat the oven to 230c.Gently heat 25g of the butter in a small saucepan, then add the shallot and garlic. Saute gently until softened but not coloured. Add the mushrooms and sweat down for another 6-7 minutes until any liquid emitted from the mushrooms has evaporated and you are left with a dark, chunky paste. Leave to cool for a minute or two.
Stir in the Salsa Truffina, Truffle Oil, Parsley and Seasoning – but not too much salt as the Salsa Truffina is quite salty anyway.
With the neck end of the chicken facing you, gently ease the skin away from the breasts, taking great care not to tear the skin (the stuffing will ooze out during cooking). If you do happen to tear the skin badly, you could use a couple of toothpicks to ‘pin’ it back into position once you’ve stuffed it.
Standing the chicken up on its bottom, use your hand to insert all the mushroom/truffle paste under the skin. Place the chicken back down and gently manipulate the paste underneath the skin until it has covered the top of the chicken evenly.
Melt the remaining butter and brush the bottom of a small roasting tin. Sit the stuffed chicken in the pan and brush over the rest of the melted butter. Cover tightly with foil and cook at this high temperature for 20 minutes.
After 20 minutes, turn down to 180c and cook for another 50 minutes.
Finally, remove the foil and cook for a final 15-20 minutes to brown the top, first basting with the juices.
Remove from the oven and retire the chicken to a plate. Wrap snuggly in foil whilst you make the risotto, draining off any of the chickeny-truffle juices to add to the creamy rice.
reade more... Résuméabuiyad

The Aubergine...

Finally the Aubergine finds a worthy home in an unlikely place (readers, please refrain from any smutty comments): in a Black Bean and Aubergine Chilli (although I used Black Eyed Beans)! I had never heard of a chilli featuring the purple beauty amongst it’s myriad ingredients but there it was on the bbc website as I did a search for Aubergine recipes. In fact, I had two options. The other was a more traditional curry so I offered my husband the choice, via text message: aubergine curry or aubergine chilli? The answer came back, predictably, as chilli. I think he would eat chilli everyday if he could.
And, because this has been an impecunious week (week? Try year), I am using everything up in the cupboard and spending as little money as possible on groceries. When I do grocery shop, I buy several items that I refer to as wildcards. What this could be is goats cheese or a bag of spinach or a cut of meat I don’t usually use. These items lay down for me a gauntlet that entails me using them up before they go bad and my husband gets mad at me for buying stuff that we don’t use for he hates waste.
Anyway, this is a perfect dish for meat-missing vegetarians or, if you’re like me, you don’t like minced beef because of some childhood trauma because the small shiny beans are very meaty in texture and absorb all the flavour of the spices.
And another thing. A good chilli often takes several hours slow cooking to allow the meat to meld with the other ingredients otherwise it can taste a little wishy-washy and lacking depth of flavour. This chilli is as flavourful as any three day old chilli after just 30 minutes simmering, giving it a place in my Quickest Suppers of All Time Hall of Fame.
AUBERGINE AND BLACK BEAN CHILLI serves 2 (but if your stomach, like mine, has an raging, ongoing war with beans, don’t serve on a first date).
Ingredients:
1 Large Aubergine, cut into 1” Cubes
1 400g Tin Black Beans (or Black Eyed Beans or other small bean), drained
1 Large Red Onion, chopped
2 Cloves Garlic, chopped
1 400g Tin Tomatoes
3-6 (depending on your heat tolerance/bravery!) Small Red Chillies, finely chopped
100ml Vegetable Oil
½ Teaspoon Ground Coriander
½ Teaspoon Ground Cumin
Pinch Cinnamon
Square of Dark Chocolate
1 Bay Leaf
1 teaspoon Chilli Powder (more if you like it really hot)
Seasoning
METHOD:
Heat the vegetable oil in a deep frying pan over medium high heat. Cook the cubes of Aubergine in the oil until lightly browned and begin to soften. They will absorb most of the oil. Remove to a plate lined with kitchen paper and leave to drain.
In the same pan add a little extra oil if needed and turn the heat down to medium low. Sauté the onion and garlic gently until softened and fragrant.
Add the chillies and cook with the onions and garlic for another minute or two, to remove the harsh raw chilli taste.
Add the tomatoes, squashing them down into the onion/garlic/chilli mixture. Then add the Ground Coriander, Ground Cumin, Cinnamon, Bay Leaf and Chilli Powder. Stir to combine.
Gently stir in the Aubergine. Simmer for about five minutes.
Add the beans and simmer for a further 15 minutes.
After 15 minutes, melt in the square of chocolate and season with salt and pepper. Taste. You may need to add a pinch of caster sugar.
You can leave this to simmer for a further 15 minutes over a very low heat but bear in mind that the aubergine will disintegrate the longer it is on the heat.
Serve with plain boiled rice or hash brown potatoes and plenty of sour cream, chopped spring onions and grated cheddar cheese.
reade more... Résuméabuiyad

Well Fed Network

Good News! I am now a fully fledged contributor/member of the Well-Fed Network, a conglomoration of foodie websites dedicated to such myriad topics as baking, cookbooks, wine, organic food, food events etc.
My first article, on Chestnut Flour (see below) has just been published on the Just Baking Site. You can view it here:
http://justbaking.net/
I am now awaiting a copy of the Desperate Housewives Cookbook for the Paper Palate site - as I have never seen the show, it should be an interesting article, taking impartiality to another level!
I will keep you posted as I attempt to write simultaneously for two blogs and hold down a regular job!
reade more... Résuméabuiyad

Banoffee Pie - The World's Easiest Pie?


There is a dessert out there that even a fully paid up member of the ‘Can’t Cook, Won’t Cook’ club can make. If you are capable of topping up a pan of boiling water once an hour and have the skills to peel a banana or three, then you are more than adequately skilled to make a Banoffee Pie AND to then sit back and receive the grateful accolades from your guests.
If you are a member of the Can’t Cook, Won’t Cook club, then it probably won’t interest you to hear that, contrary to popular belief (albeit understandably), Banoffee Pie is not an American delicacy although it is in keeping with traditional American pies that usually comprise of a Graham Cracker Crust (what us Brits call a Digestive Biscuit base) with a rich filling, often chocolate or caramel or coconut, and topped with a swirling cloud of whipped cream.
In fact, compared to the century old Boston Cream Pie, the Banoffee Pie is but a mere whippersnapper. The first mention of such a pie was on a menu at a pub in East Sussex, called the Hungry Monk, in the early 1970s. The etymology of the word is shrouded in confusion. The pub, who still have it on their menu, spell it Banofi but it appears elsewhere with extra Ts, Fs and Es. I can only assume that this is a copyright issue although the basic recipes remain virtually identical.
A good Banoffee Pie should comprise of a biscuit crust, a caramel filling layered with sliced, fresh bananas, topped with the obligatory whipped cream and perhaps some more sliced bananas and grated chocolate for decoration. A shortcrust pastry could be switched for the biscuit crust but everything else must remain the same or else it stops being Banoffee, which in case you hadn’t realised by now is a combination of banana and toffee.
It is a dessert for the most unashamed owner of a sweet tooth: bananas are incredibly sweet anyway, so combining them with caramel is a recipe for making your pancreas quiver in fear.
Anyway, enough historical banter, here then is the recipe:
BANOFFEE PIE
Ingredients:
150g Digestive Biscuits, crushed into crumbs
75g melted butter
400g tin Condensed Milk
2-3 Large Bananas
Grated Chocolate
284ml Carton Double Cream
METHOD:
Make the base. Gently melt the butter in a small saucepan and add the biscuit crumbs. Remove from the heat and stir well, until the crumbs have absorbed the butter. Press into a 20cm Flan Tin (preferably a loose bottom one but I actually used a sandwich tin). Chill in the fridge until the caramel is ready.
Make the caramel: Fill a large pan with water, put the can of condensed milk in and bring to the boil. Turn down to a gently simmer. Simmer for four hours ensuring that the water level NEVER FALLS BELOW THE HEIGHT OF THE CAN.
After four hours, remove the pan from the heat and, using tongs, remove the can from the water. Leave aside to cool for about 15 minutes or so. Open with a tin opener and scrape out the caramel using a spatula onto the biscuit base. Spread evenly and chill in the fridge. You can lick the spatula and you will see that the caramel tastes, to me anyway, like the skin on my mum’s rice pudding. Completely delicious but not too sweet.
Whip the cream in a bowl with about a teaspoon of icing sugar. This won’t particularly sweeten the cream but it will stabilise it, if you have to wait awhile before eating it. Make sure the cream is peaking quite firmly.
Slice the bananas and lay them, in whatever pattern you desire, on the caramel, retaining some for decorating the top.
Slather over the whipped cream, swirling it all over, then decorate with banana slices and grated dark chocolate, if you desire.
Serves four very greedy, sweet-toothed eaters (in other words, a quarter of the pie each!!!).
reade more... Résuméabuiyad

Book Cover of the Week


This week’s Book Cover of the Week is the first cookbook that I ever became acquainted with, the Readers Digest Cookery Year. When I was very young, my mum was quite the adventurous cook, as was the wont for people in the 70s: cookery writers like Elizabeth David and Robert Carrier had broken down that stoic 1950s attitude that you had to cook frugally and frugality equated to boring food. Avocados were being used with abandon and recherché dishes like soufflés and lasagne were being served at dinner parties throughout the country.
As my mother attempted to entertain my father’s family (only with partial success: the older half were strictly stuck in the Lancashire Hot Pot mindset, but the younger members were somewhat more open-minded...but that’s another story altogether), she subscribed to Robert Carrier’s weekly cookery magazine Carrier’s Kitchen and to Marguerite Patten’s Cookery Cards (you paid your fivepence and received a little packet of cards that you filed diligently away in a hard plastic box). I remember eagerly anticipating the arrival of both. I would then spend hours pouring over the colourful dishes that Robert Carrier produced. Delicacies like ruby red Poached Pears (they took pride of place on the cover of the first issue) and Lobster Thermidor seemed so exotic to this particular seven year old. I dreamed of the day when I would be leading a wealthy life as either the wife of a prince or a nurse (!) and would be able to eat food like this all the time. Of course, I didn’t marry a bonafide prince nor did I take up a career in medicine and I still haven’t tried Lobster Thermidor yet. However, those magazines opened my childish mind (and insatiable appetite) to Food!
As I got older and my father and his family gradually drifted away, there was only the two of us to cook for so the dinner party menus were thrown out in favour of parsimonious (but no less tasty) food.
Whilst we mostly ate regular food like Spaghetti Bolognese, Beef Stew, Baked Potatoes with Beans and – my all time favourite – egg, chips and mulligatawny soup (don’t knock it until you’ve tried it, I thought it was ‘normal’ to have mulligatawny soup poured on your egg and chips until a group of school-friends looked aghast at me when I suggested it), at birthday parties my mum would really push the boat out. This meant referring to the ‘special occasions’ section of the Cookery Year. She would serve egg sandwiches cut into fancy shapes, sugar mice floating skimming green ‘grass’ jelly, cakes shaped like clocks: the hours and hands recreated with chocolate buttons and tiny, tooth-crunching silver dragees. My mum’s famous, tried and tested and frequently requested Quiche came from, you guessed it, the Cookery Year. When I moved out, my mum gave this book to me, just as it had been given to her when she left home.
The Cookery Year, a large, landscape book, was published by the Readers Digest in 1973, (it predates Nigel Slater’s Cookery Diaries or the River Cottage Cookbook by some three decades) by taking the innovative approach of devoting each month to a chapter, highlighting seasonal food and recipes. There are also useful drawings of pigs, cows and lambs, diagrammatically scored into their relevant cuts of meat, pages of beautifully painted fruits, vegetables and cheeses (these are particularly interesting for they show produce that was considered unusual 30-odd years ago, some of which still, sadly, remain in the small ‘novelty’ foods section of the supermarket, proof that not that much changes in 3 decades) and a interesting historical footnotes and noteworthy events that were celebrated – many of which have now faded into obscurity.
The other chapters that enchanted me as a child (and still do!) were the painted eggs, exquisite, delicately blown hen’s eggs of which I would not have a hope in hell of ever recreating, and the confectionary and biscuits. Despite the complexity and some anachronisms (brains in a black butter sauce anyone?), the recipes for the most part remain sound. This is in no small part due to the high calibre authors working on it: Jane Grigson, Marika Hanbury Tenison and Margaret Costa for example.
To me though, The Cookery Year always reminds me of a more simple time of my life, when money and relationships weren’t an issue, and I could just go to the sweet jar and know that there’d be a homemade fairy cake with butter icing or jam tart with my name on it. I have never cooked from this book, nor do I know if I ever will but I do know that it is imbued with two generations of memories that are evoked, simply by opening it up.
reade more... Résuméabuiyad

Adopt a Greyhound This Christmas


All animal sancturies are overflowing with discarded pets all desperate for a new home this Christmas. Greyhounds are particularly close to our heart so if you are interested in adopting a dog, please consider one of these long legged lovelies. They don't require as much exercise as you might think (I'm sure a lot of people don't like the idea of long walks in the wintertime), and are loving, gentle and sometimes raucous dogs! We adopted our greyhound from Clarks Farm but if you live further away, try http://www.retiredgreyhounds.co.uk/ who can put you in contact with your local home. If you are not ready for adopting a dog yet, please consider buying your Christmas Cards or office calendar from them - we're very proud parents because our beautiful girl Coney is Miss December! The staff at Clarks Farm all work tirelessly to ensure that no healthy dog is destroyed and that all dogs in their kennels are healthy and happy. However, they would be much happier if they could share a spot on the sofa with you - or underneath the Christmas Tree next to a warm fire!


reade more... Résuméabuiyad

Unusual Ingredient of the Week - Dulce de Leche

Basically boiled milk, Dulce de Leche literally translates as Sweet Milk or Candy Milk. It is a traditional South American delicacy, known in Mexico as Cajeta, originally made with half goat’s, half cow’s milk and cooked slowly with sugar. It is steeped in legend as to how it was originally discovered, but one Argentinean legend suggest it was a cook’s fortuitous non-attentiveness when making lechada (a milk and sugar drink) that produced this golden elixir. Another story firmly puts the invention on European territory, in France during the 14th Century where a headstrong servant girl attempted to upset her master for making her boil many pans of milk, so she deliberately sabotaged the milk by adding too much sugar and leaving it to cook for a long while, turning it into a brown jam (hence Confiture de Lait) that actually tasted delicious.
It is gradually gaining popularity with us Brits who are always a bit slower on the uptake than our Gallic neighbours and you can buy Dulce de Leche in jars over here now, produced by fine food companies as Merchant Gourmet but I think it’s much more fun to make it in a more traditional (and dangerous) way. Not that I’m advocating danger in the kitchen.
The process of boiling a can of condensed milk for four hours sounds like it might produce something entirely inedible but it actually makes the luscious, smooth, creamy caramel that's used for the filling of Banoffee Pies, poured over ice cream, used in flans or just eaten straight from the can. Simply put a can of Condensed Milk in a large saucepan, cover it with plenty of water and simmer gently for four hours. You must make sure the pan does not boil dry otherwise the can might explode. What takes place during the long cooking process is known as the Maillard Reaction, whereby carbohydrates and proteins react together, causing the colourisation and caramelisation of certain food items. The same process takes place when you roast meat or toast bread. As you can imagine, this is an important facet for the food industry who exploit it readily to produce the ‘baked goods’ aroma found in pre-packaged foods, such as popcorn or bread and for colouring Maple Syrup and Beer and even fake tan!
I will not be utilising the Maillard Reaction to tan my skin just yet, but I will be making a Banoffee Pie tonight to take to an informal dinner party tomorrow. It is, apparently, the hostess’s favourite dessert.
reade more... Résuméabuiyad

An Interesting Supper


Sometimes I have more than one recipe that I want to cook at one time. This usually coincides with various ingredients going bad in the fridge that I need to use up in a hurry. Last night was such a night. I had a large bag of spinach and some cooked beetroot that were looking sadder by the minute, so, I had originally planned on making a curry of some sort, also using up a floppy aubergine (but that will have to wait now until Thursday). I spent the morning scanning all my cookbooks but couldn’t find a curry that seemed quite right, either it didn’t use the aubergine or it didn’t use spinach, and besides I didn’t really fancy curry for dinner anyway.
So, armed with my Roast Figs, Sugar Snow book by Diana Henry (one of the most beautiful and usable cookbooks I have ever encountered), I spent my lunch-hour chowing down on Southern Fried Chicken flavoured Super Noodles and looking for something completely different to cook. That recipe soon came to me in a bolt of lightening: Beetroot Knodel. Knodel are Tyrolean dumplings, lightly poached in water until they bob to the surface, puffy and light.
However, Knodel don’t constitute a whole meal, so to use up the Spinach I made gratin and to use up some rubbery potatoes that were starting to resemble as science fiction monster I made Tartiflette, also from Roast Figs, Sugar Snow. Tartiflette is a French dish that should use Reblochon cheese (a soft rind cheese), potatoes sliced up, fried in some butter and baked in the oven with lardons, onion, garlic, and creme fraiche. I only had Taleggio but the success of the dish relies, apparently, on the use of Reblochon. Unfortunately cooking sometimes relies on what you have in the fridge and providing the end product is good and there is nothing left on the plate, it has been a success, albeit an unorthodox one.
My husband loved this dish because it reminded of similar dish he ate as a child in Door County.
I wouldn’t necessarily recommend cooking all these dishes together under normal circumstances as they all cook at the same time and the Tartiflette and Gratin require different cooking temperatures but both need to be served piping hot. I was merely experimenting on your behalf.
Now I just to find a use for an Aubergine...

BEETROOT KNODEL (serves 6, I roughly halved this to serve the two of us)
Ingredients:½ tbsp Olive Oil
½ Small Onion, finely chopped
1 Clove Garlic, finely minced
300g cooked, peeled and finely diced Beetroot (you can use ready cooked in the vacuum packs)
200g White Breadcrumbs
125ml Milk
1 Beaten Egg
2 Tbsp Flour
Seasoning
METHOD:
Heat the oil in a frying pan and very gently sweat off the onion and garlic until translucent and fragrant. Add to a mixing bowl, along with all the other ingredients. Stir thoroughly and season well. This mixture will stand for a while before it needs preparing if you have other things to prep in advance.
Bring a pan of salted water to the boil then turn down to a simmer.
Lightly flour a baking sheet.
Wetting your hands, break of bits of the dumpling batter, which will be very sticky, and form them into rough ball shapes, around the size of walnuts. Place them on the floured baking sheet.
Drop them carefully into the simmering water and poach for about five minutes or until they bob to the surface, like tiny, pale purple meteors.
Serve drizzled with melted butter and grated Parmesan.
Note: These are not ‘pretty’ or look like the dumplings our mums serve us in beef stew. They are nubbly and blotchy in colour, more like varicose veins I suppose. However, their taste far exceeds the look of them. They are delicious. I think that they would make a perfect starter because the batter is so easy to prepare and put to one side until you’re ready to cook them. They must be served piping hot though.

TARTIFLETTE (serves 2)
Ingredients:
1.5lbs Potatoes (preferably waxy, I used large white baking ones that are a bit too floury, if this is all you have, just take care not to over boil them)
50g Butter
Olive Oil
100g Bacon Lardons
1 Small Onion, chopped
1 Clove Garlic, crushed
1 Reblochon (or some other soft melting cheese like Taleggio, not Mozzarella as it doesn’t have a strong enough flavour), sliced
50g Creme Fraiche
METHOD:
Preheat the oven to 190c.
Peel and boil the potatoes in salted water until just tender. Drain and when cool enough to handle, cut into slices.
Heat the oil and half the butter in a large frying pan and add the potatoes. Cook until golden. Put in a shallow ovenproof dish.
Season well.
Melt the rest of the butter in the same frying pan and add the bacon, cooking on a high heat until they are crispy and starting to brown. Turn down the heat and add the onions and garlic. Cook for another couple of minutes until the onion and garlic are softened and golden.
Add the lardons, onion and garlic to the sliced potatoes and combine gently. Dollop over the creme fraiche and blanket with slices of the cheese.
Cook in the oven for 15 minutes, until golden brown and bubbling.

SPINACH GRATIN (serves 2)
Ingredients:
300g Spinach Leaves
100ml Double Cream
1 Egg, beaten
Seasoning
Nutmeg
50g Parmesan, freshly grated
A little Butter
METHOD:
Preheat the oven to 220c.
Rinse the spinach in a colander and add to a large pan, with no water, and cook briskly over medium high heat, stirring all the time, until wilted. About 3 or 4 minutes.
Drain and using the back of a spoon, squeeze out the excess liquid.
Spread out in a buttered gratin dish.
Whisk together the cream, egg, salt, pepper and grating of fresh nutmeg. Pour over the spinach.
Sprinkle over the grated Parmesan and dot with butter (this helps it brown deliciously).
Put in the hot oven for about 20-25 minutes or until golden brown and bubbling.
reade more... Résuméabuiyad

A Pointless Survey That I Had To Do...

I don't normally go in for these kind of things, but, hey, the truth is out there...

You Are an Excellent Cook

You're a top cook, but you weren't born that way. It's taken a lot of practice, a lot of experimenting, and a lot of learning.
It's likely that you have what it takes to be a top chef, should you have the desire...
reade more... Résuméabuiyad

Ribollita - Reboiled Soup


On Mondays, I always like to cook us a vegetable laden, low calorie meal, a sort of detox following the cooking/eating frenzy that we often spend the weekends in.
As it’s now halfway through the month and, as usual, most of our money has been spent paying bills (and, er, buying cookbooks), I always find it a challenge to cook something different using just the scraps of ingredients left in the fridge. Soup is always a good option, being one of the most heart-warming dishes known to man, but isn’t always substantial enough. Enter Ribollita.
Ribollita is an Italian soup, translating as reboiled. What this often refers to, in Italy, is the reusing of the previous night’s Minestrone, mixed in with left over vegetables (in this case, Cavolo Nero or black cabbage) and chunks of stale bread. Re-boiled also refers to the soup often being prepared the day before it is to be eaten, thus allowing the strong flavours to intensify and meld. This produces a wonderfully thick, rich and hearty soup that is almost a stew. Whilst the word 'reboiled' conjures up shuddering memories of school dinners, this is eons away from the cabbage that was to within an inch of it's life that we endured at school.
Utilising my own bedraggled and more than a little limp vegetables and stale bread (I am now in the habit of freezing any nub ends of bread that are left, rather than having to buy a loaf simply to make breadcrumbs), plus an unopened pack of Butter Beans (which are totally untraditional but that was all I had). It must have been a hit though because there were no leftovers so I am unable to state whether or not it is better the next day (although I am sure it is!).
RIBOLLITA
Ingredients:
150g Dry White Beans, preferably Cannellini, but I used Butter Beans. Butter Beans are not quite as successful because they suffer from a slightly mealy, crumbly texture that tends to cook much quicker than other dry beans. They have a tendency to break up into the soup. Whichever beans you use, they must be soaked all day or overnight (I put mine in cold water at 7.30am to cook at 5.15pm and they were just fine).
1 Small Potato, peeled
1 Old Tomato (or any tomato in fact, I put old because most people have one tomato rolling around their fridge somewhere)
3 Sticks of Celery, skimmed over with a vegetable peeler. No one wants l celery strands wrapped around their vocal cords. I used the frondy bits that you get on untrimmed celery, which adds a delicious herbal taste to the soup, which otherwise has no herbs in it.
2 Carrots
1 Large Red Onion
3 Cloves Garlic
Pinch Chilli Flakes
Olive Oil
400g Tin Tomatoes
350g (roughly) of Cavolo Nero or Kale or Savoy Cabbage. It is quite hard to get the black cabbage here and although it has a more anise flavour than the Kale or Savoy, they can be used instead (I used Savoy cabbage). Just make sure that it has dark leaves. White cabbage would give a more boggy flavour than you want here.
Couple of Handfuls of Stale Bread, torn into chunks
Salt and Pepper
METHOD:
Drain and rinse your soaked beans. Add to a pan of water with the peeled potato and the tomato, squished. Bring to a rapid boil for 10 minutes, then turn down to a slightly jiggly simmer for another half hour or so, until the beans are tender. Do not salt the beans at all yet. The salt will toughen them. This applies to the cooking of all dried beans. Once cooked, drain, reserving a cup of the cooking water and leave to one side until you are ready to add them to the soup. Discard the potato and tomato. These add flavour to the otherwise flavourless cooking water.
Whilst the beans are cooking chop all the vegetables into small dice, or thereabouts. Gently heat some olive oil in a deep sauté pan (or large saucepan) and sweat off the onion, until translucent. Then add the garlic, cooking for a minute or two and then the rest of the vegetables and chilli flakes, excluding the tinned tomatoes and cabbage.
Leave the vegetables to slowly sauté in the olive oil, amalgamating all their flavours. This is an important step in dish that involves vegetables to be cooked in this manner. It softens them and gives them a united flavour, rather than the odd harsh crunch on a lump of carrot or celery.
Once the vegetables have been sweating down for 10 minutes or so, add the cabbage, stirring into the diced vegetables thoroughly. Cook over a low heat for another 5 minutes or until the cabbage has wilted. Pour over the tinned tomatoes, drained beans, bread and the reserved cooking liquor. Stir gently, and simmer for another half an hour.
Season well with salt and pepper, drizzle with good quality olive oil and serve in deep soup bowls, maybe with some more bread for dipping.
reade more... Résuméabuiyad

A Clutch Of Easy Desserts


I pity the non-pudding people. Those who decline dessert for cheese and crackers, or coffee instead. I could not, even under the threat of torture, choose between sweet or savoury food. For someone to recklessly declare ‘I’m a savoury person’ is completely incredulous to me. More incredulous even, than people who don’t like cheese. Not liking cheese! Talking from the point of view of somebody whose intake of calcium is purely through copious intakes of daily cheese, this is like saying, “I don’t like oxygen”.
Of course, everybody has wildly varying tastes and if this wasn’t the case, then planning meals around everyone’s food preferences would be so much less interesting and, ahem, challenging.
Even so, when I go out for a meal the dessert course is always the dish that I desire the strongest. True, I enjoy the starter and main courses too, but there is something about the pudding, the anticipation because it is always served last but not least. I am always hugely upset when I am too full on the starter and main course to partake in dessert and to this end, I often make a dessert which I will serve to my dining companions, much later on, when we’ve left the restaurant. It seems like it defeats the purpose of eating out, I suppose, if you make your own dessert but I find it works well. Also, you can command the portion sizes too...
I love all desserts. From puddings to pies, cakes to choux buns, ice cream to cheesecake, pavlova to knickerbocker glory. All of them inhabit a special, jewel-encrusted space in my heart.
Each weekend I try to make a different dessert. I am on a secret mission to discover the world’s most perfect chocolate mousse (and I have come close on many occasions), ever since I first tried it at school, aged 6, a milk chocolate, frothy confection served in little roly-poly catering glasses, dissolving on your tongue like a cocoa whisp, the dollop of dream topping (basically synthetic cream) finishing off the chemical wonder perfectly. These days I prefer something with more bite, and a higher cocoa content. I hated dark chocolate when I was younger. Back then, my virginal taste-buds were untainted by excess and craved nothing more sophisticated than frozen Black Forest Gateau and Neopolitan Ice Cream. In many ways, I miss those days, where I could eat no end of junk food and still be as thin as my greyhound. Still, those days are long gone, replaced by well-prepared (but no less calorific, I fear) desserts that I’m sure taste much better than those pre-packaged cakes that start to literally evaporate before your eyes as they thaw out.
I could extol the virtues of chocolate (and I have) but for now I will simply give you a delicious and simple recipe for chocolate mousse, this one delicately flavoured with Cardomom and Chocolate Liqueur but this is just a blueprint for your experimentation. Espresso Coffee, Chilli, Cinnamon, Bay Leaves – all would infuse your mousse with the most amazingly deep flavour. Just be sure to use good quality chocolate of no less than 65% Cocoa. I use Lindt 70%.
CHOCOLATE MOUSSE WITH CARDOMOM AND CHOCOLATE LIQUEUR
Ingredients:
130g plain chocolate (see note above)
85ml chocolate liqueur
2 cardamom pods, de-husked, seeds lightly crushed
2 eggs, separated
2 tbsp caster sugarcrème fraîche to serve, optional
You will also need four or five ramekins or little espresso cups.
METHOD:
Melt the chocolate in a bowl over a pan of lightly simmering water. Add the coffee and liqueur. Do not let it get to hot otherwise it will seize up. If this does happen, don’t panic, remove from the heat, add a couple of drops of milk and beat like mad. It will come back again. Leave to cool.
Whilst the chocolate is melting, whisk the egg whites in a bowl until softly peaking. Add the caster sugar and continue to whisk until it has stiff peaks. I highly recommend using an electric hand whisk. Less arm power than a manual whisk, less washing up than a Kitchenaid.
Once the chocolate has cooled a little, beat in the egg yolks, one at a time.
Gently fold in, using a metal spoon, the egg whites into the melted chocolate, a few tablespoons at a time until the two mixtures are completely mixed together.
Spoon delicately into your ramekins and chill for at least an hour. Overnight is best of all. Serve with a dollop of creme fraiche, the sourness of which perfectly counters the rich mousse.

Another classic dessert that has suffered the indignity of being sold re-hydrated in packets (just stir and see!) is the cheesecake. There are many different permutations of preparing a cheesecake, some involve being cooked within a bain marie, others are served with no cooking at all. Some are flavoured and tinted. My favourite is what my husband calls New York Cheesecake but the following recipe was in fact taken from Rick Stein’s French Odyssey, so some cross-pollination going on here. This cheesecake is simple, creamy beyond belief and tastes a lot like homemade vanilla ice cream but is made wonderfully tangy with the addition of some lemon juice and zest. Served with a simple fruit compote, it is a perfect, sophisticated dessert.
CHEESECAKE
Ingredients: Serves 6 generously
For The Base
100g butter
200g digestive biscuits, crushed
2 tablespoons caster sugar
For the cheesecake itself:
500g Cream Cheese (must be full fat)
200g Caster Sugar
3 medium Eggs
2 Tblsp Cornflour
300ml creme fraiche
Zest and juice of 1 lemon
METHOD:
Firstly, make the base. Gently melt the butter in a saucepan. Add the bashed up digestive biscuits (always a rewarding job, bashing things up, particularly if you’ve had a bad day) and the sugar. Stir until well coated. Remove from the heat.
Lightly oil a 20cm Springform Tin. Pour in the buttery digestive mixture and press down firmly with the bottom of a spoon.
Preheat the oven to 150c oven.
Beat together the cream cheese and the sugar until smooth and glossy.
Add, one at a time, the eggs, beating well until fully amalgamated.
Finally, whisk in the creme fraiche, lemon zest and juice and cornflour until smooth and lump free.
Pour the primrose coloured mixture onto your digestive base and carefully place in the oven. Cook for between 45 minutes to 1 hour. Once cooked, it will still be pale and have a slight wobble to it. Turn off the oven but leave the cheesecake in the oven until completely cooled. Don’t do as I did – look at it after 45 minutes and think it’s still uncooked. It isn’t. The mixture is still very glossy, even when cooked, so it resembles liquid. I left it for another 7 or 8 minutes by which time it had cracked slightly. Also, don’t think about removing it from the oven until cold. I did and the small cracks became quite large craters. The warm cheesecake doesn’t respond well to the instantaneous temperature difference you see. They don’t tell you that in the cookbooks. Most books make some vague comment about leaving it to cool but allude it to tradition. It’s not. There is a scientific basis behind it that is founded in the final aesthetics of the dish. Not to worry though if it does crack. It still tastes wonderful and you can always drizzle the compote artistically over the cracks so no one will ever know except you.
The compote is simply made by crushing some berries (in this case raspberries) with a little caster sugar, then sieving. Stir in some whole fruits and chill.

A quick, informal dessert is one taken from Nigel Slater, which I have renamed Apples in the French Style A La Mode. It is simply apples cooked in a brandy sozzled syrup, served over warm croissants, topped with ice cream.
APPLES IN THE FRENCH STYLE Serves 2
Ingredients:
2 Cooking Apples, cored, quartered, then quartered again.
25g Butter
2 Tablespoons Golden Caster Sugar (which imparts a much more caramel-ly flavour than regular caster sugar)
Slosh of Brandy (Apple Brandy would be great, I happened to use my homemade Quince Brandy because that was all I had, regular would also be fine).
2 Large Croissants
Some good quality ice cream, Vanilla or Caramel flavour.
METHOD:
Melt the butter in a saute pan, once starting to gently sizzle, add the apple slices. Cook until starting to go golden on each side, no more than five minutes.
Add the sugar and brandy, let it all whoosh up and coat the apple pieces. Cook gently for another couple of minutes.
In meantime, split the croissants and warm under a hot grill, do not toast though.
Pour the bronzed and sticky apples over the split, warmed croissants and put a couple of scoops of ice cream on each half.
reade more... Résuméabuiyad